The DIY Laptop
 The end result of this experiment.
Background
Back in August, I decided to ditch my horribly dated Toshiba Satellite and set myself up with a new computer. Based on my experience buying a low-end laptop the previous time and then my inability to meaningfully upgrade its RAM or hard disk, I wanted something that was atleast mid-range for today, and upgradeable in the future. Turns out, it's very difficult to find a mid-range laptop that doesn't have a ridiculous price markup. And barebones, easily upgradeable laptops are prohibitively expensive.
So I looked into other options - especially in the DIY area. There's a fair amount of talk about "DIY laptops", but everyone interprets the phrase differently and there are very few actual results beyond somebody's ridiculously over-the-top plans or really weak builds based on TV sticks.
Enter Intel's NUC (I spent a good 2 months with research before deciding upon the NUC, but I'm skipping all the ideas I ditched for the sake of brevity).
 The Intel NUC 5i5RYK. Source (along with an in-depth review): Digital Trends.
The intel NUC is an unusually-powerful mini-PC. There's a whole class of PCs in this form factor, but the majority of them pack whimpy Atom processors and have soldered RAM or few connectivity options.
This particular model packs a 5th-generation i5-5250U dual-core processor with intel HD 6000 graphics capable of 768 GFLOPS [1] all at a 15 W TDP. It also accepts 2x8GB LPDDR3 DIMMs and has one M.2 slot for your choice of SSD. The price tag is around $350. Couple this with a display, battery, keyboard and touchpad, and you've got a decent laptop.
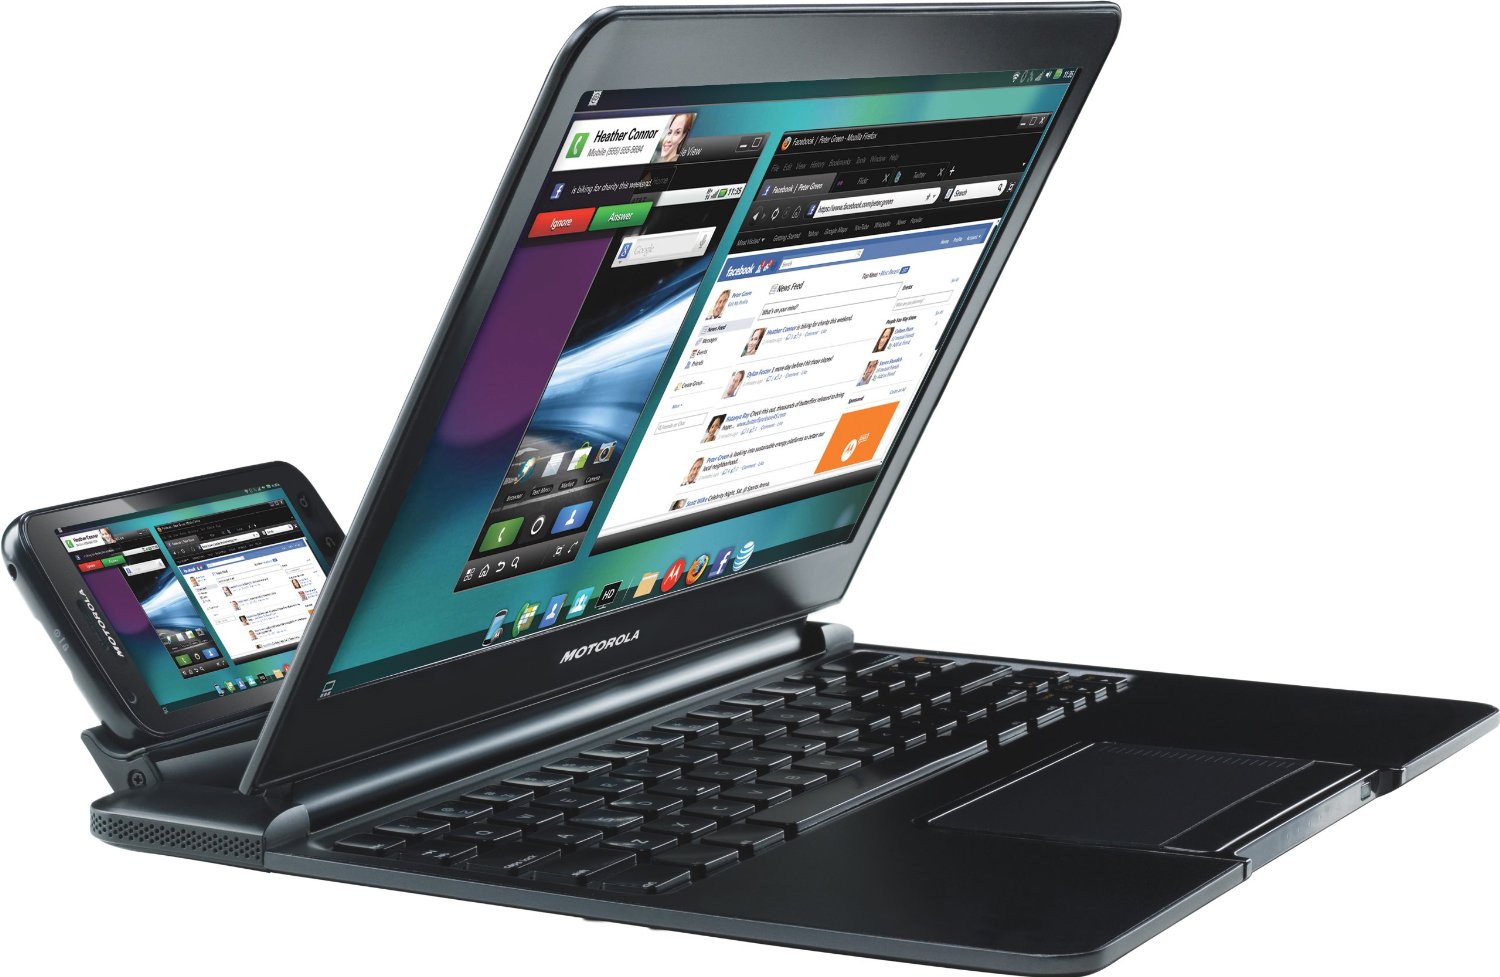
And... enter Motorola's failed Lapdock project:
 Source: Amazon product page.
The Lapdock provides all the components I listed previously, plus a pair of (weak) speakers and exposes all those peripherals over a single USB connection + one HDMI connection. It was originally designed to be paired with a specific Motorola phone model, but that's irrelevant - it can be connected to anything.
Let's Get Hacking
Naturally, these two products should pair with each other. The next thing to determine is whether the Lapdock could source enough power for the NUC or if I'd need an additional battery (the Lapdock is just designed to charge a phone and host a pair of USB devices - it might not be spec'd high enough for the NUC system). So I cracked open the Lapdock and found my way to the battery circuitry.
This part was new to me - batteries are an intimidating thing when it comes to safety. I figured Motorola, being a fairly reputable company, had the proper protections very close to the cells, if not actually integrated into the batteries, so I just attached clips right near the base of the bus that transmits power from the battery circuitboard to the main circuit board, made a mental note of where my (electrical-)fire extinguisher was, attached an "adjustable load", and measured the voltage across the load as I adjusted it.
 A low-precision "adjustable load" for the hapless engineer.
I approximated the maximum power supply by adjusting the load between 12 ohms and 3 ohms, measuring the voltage across the load after 30 seconds and using Ohm's P=V^2/R relationship.
I stopped at 35 W as a precaution (it's enough for my application), but presumably one can extrapolate further based on these results plotted below.
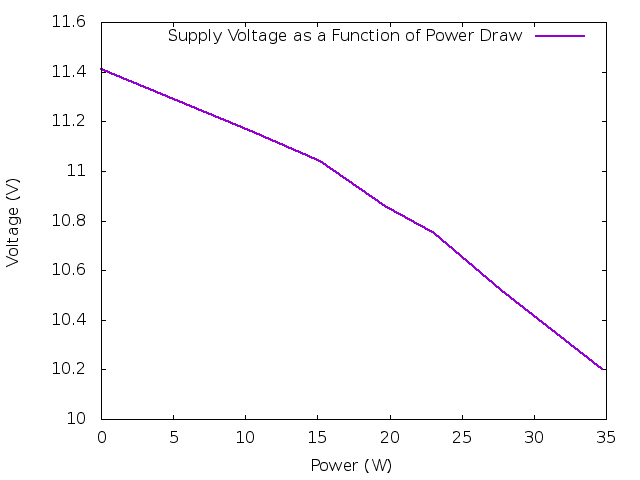 Voltage vs. Power measured at full-charge with ambient temperature around 25 C.
I don't know much about battery chemistry, but if we model the battery and its control circuitry as a Thevenin circuit, we can infer that over 4 W are dissipated in the surrounding circuitry when the load reaches 35 W (i.e. 89% efficiency). I don't know the implications of this -- the lapdock's shell should serve as a giant heat-sink if necessary, and this heat is already spread over much more area than a single IC -- but I still wouldn't push it. Fortunately, power loss appears to have a quadratic relationship with the load (which is intuitive); a 20 W load causes only about 1.1 W in power loss, and that's our target operating range.
Now, the NUC advertises an input voltage anywhere between 12 V and 19 V. I figure that the 12 V would be aimed at robotics - many of which are powered by batteries with a nominal voltage of 12 V. Hence, it wouldn't be unexpected if it's really designed for ~11.5 V, as the battery drains or heats up, and it's good practice for manufacturers to add error margins to this number on top of that.
So in the spirit of error margins, or rather, against that spirit, I figured I'd at least try connecting the lapdock's power supply directly to the NUC before trying to find where to hack on a voltage regulator.
 I only had green wire...
 That blue light looks promising...
 Tidy things up & connect HDMI + USB...

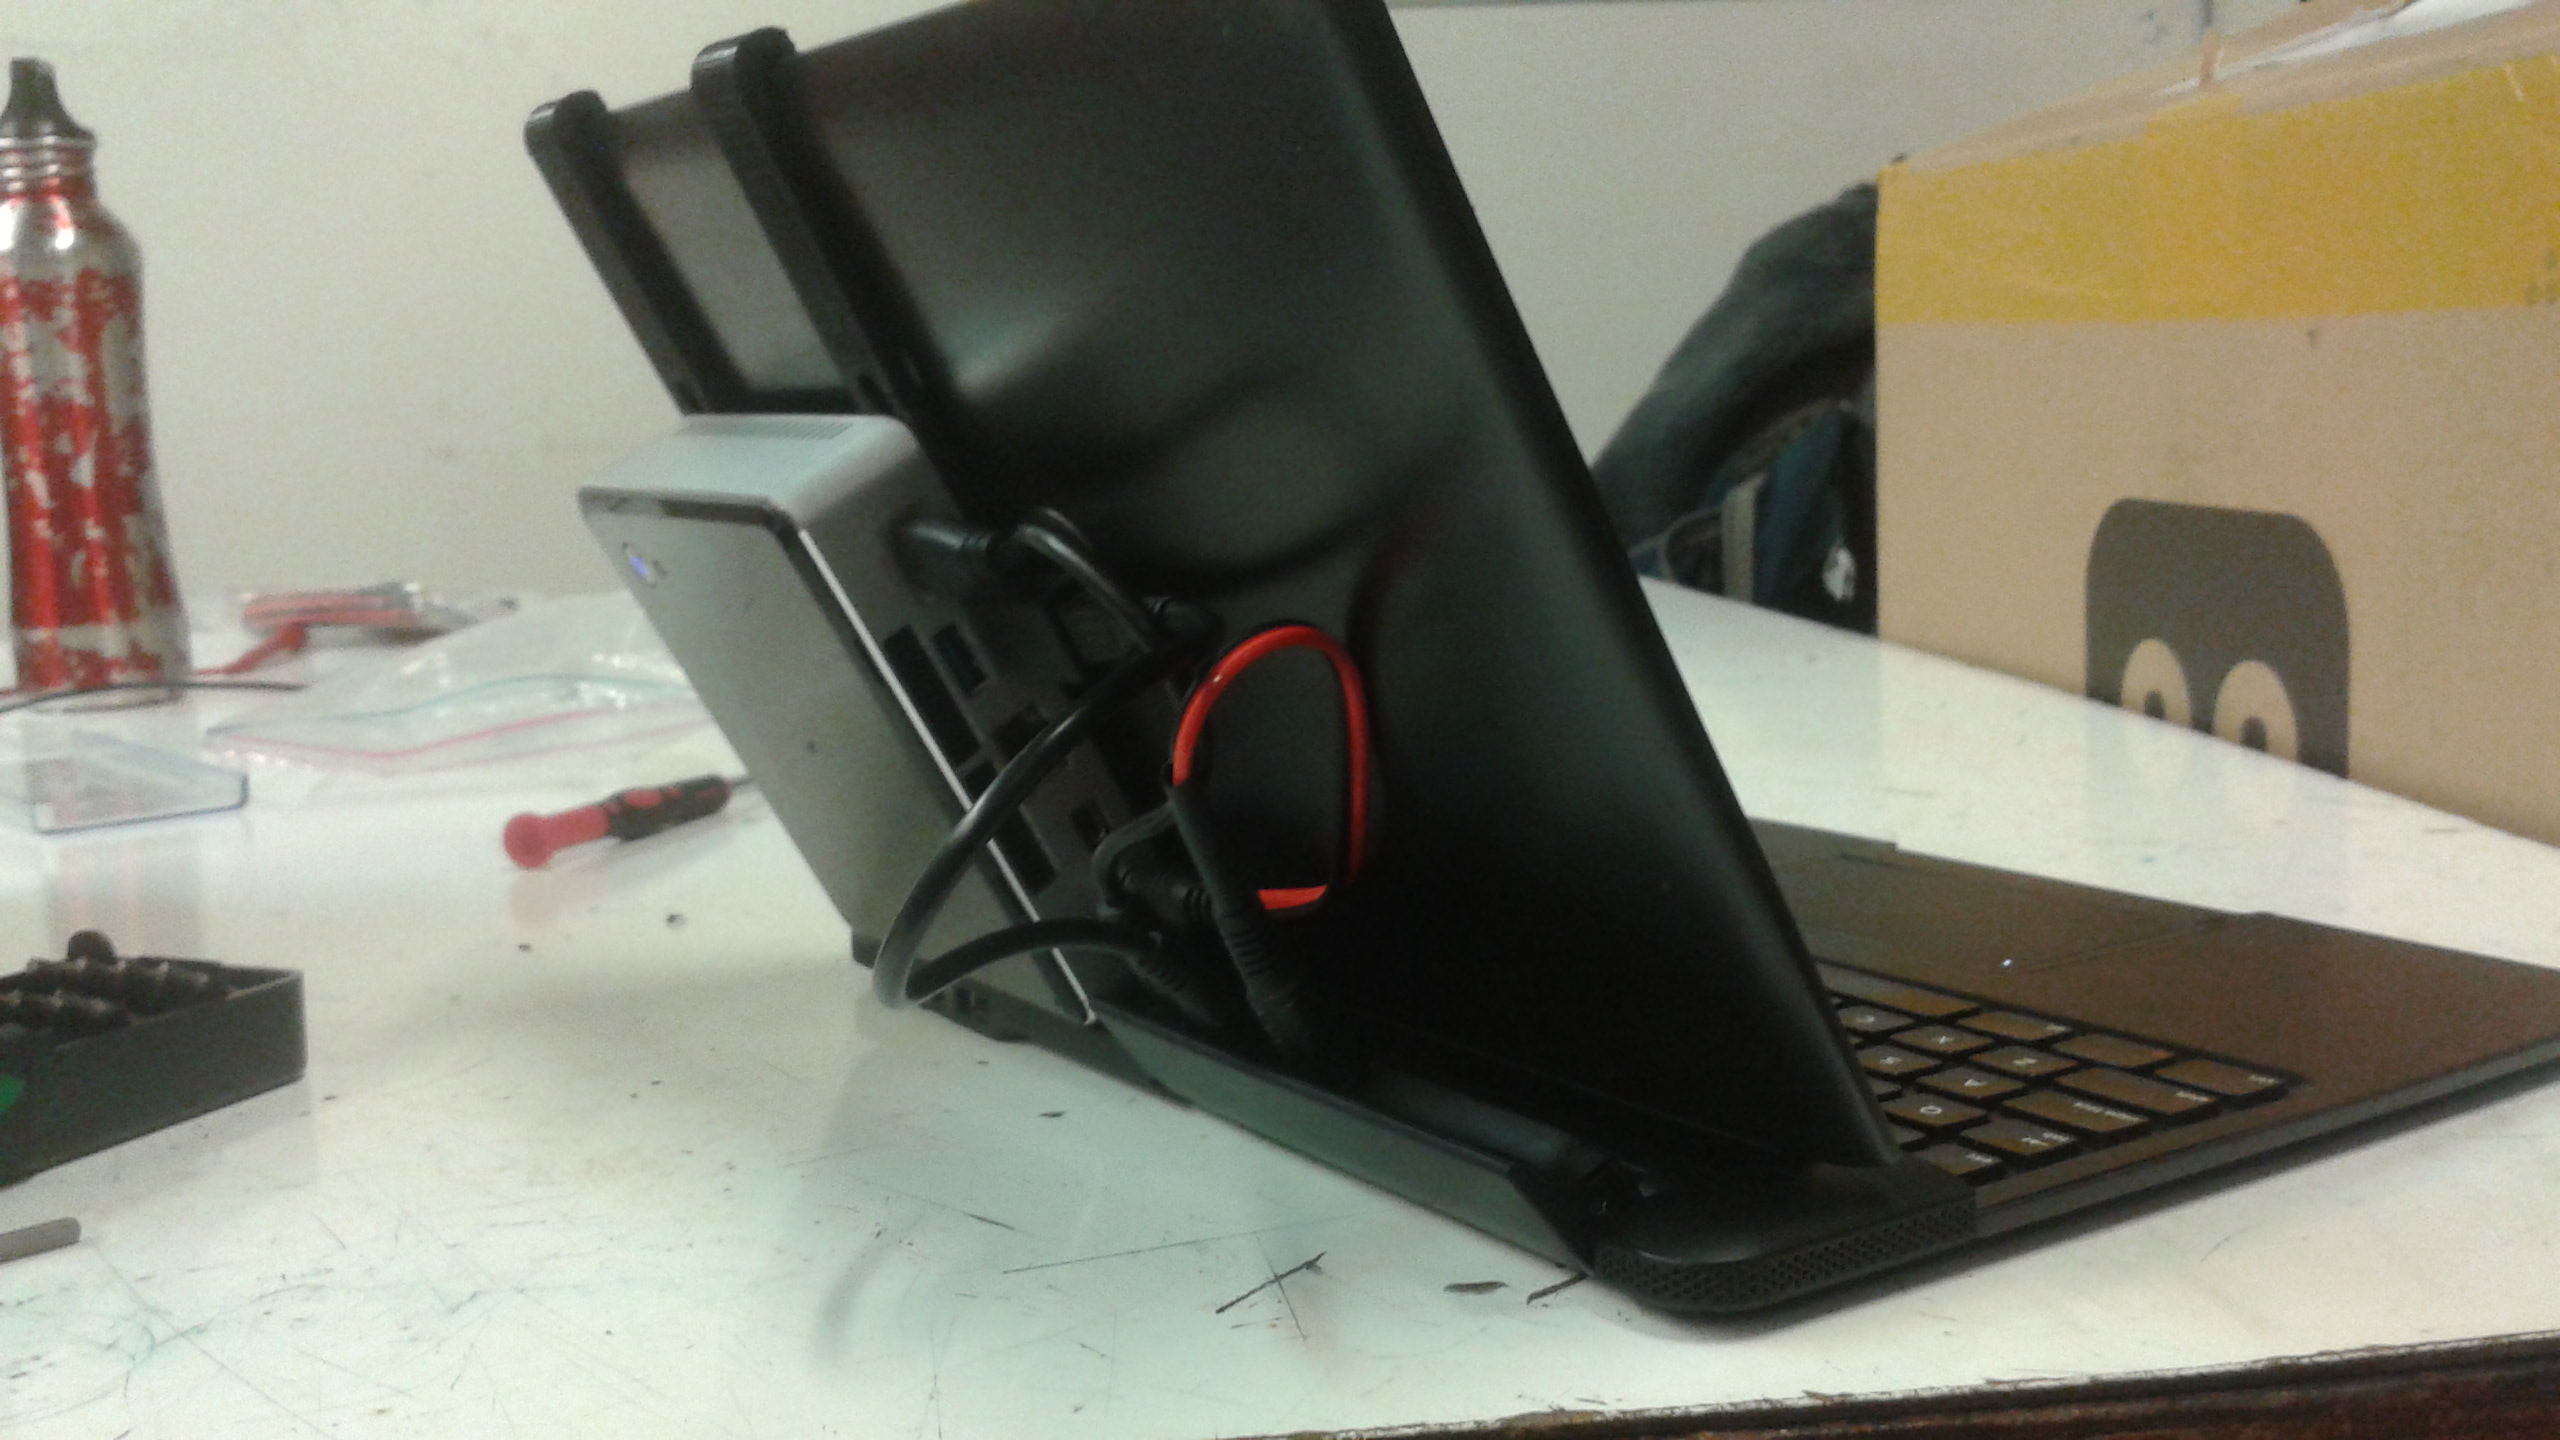
Lo and behold, it works!*
*Well, on a full charge, anyway. There have been a handful of times over the past 9 months when the NUC powers down at around the 20-40% battery level. It seems to happen in warmer weather.
A Better Mount
This doesn't exactly fit into the "laptop" category in the form shown above, so I needed a way to fix that. The NUC actually has some hardware on the underside that's designed to interface with a VESA mount. I considered gluing a VESA mount onto the Lapdock, but I felt that might become too restrictive in the future.
Instead, I decided to create a set of "J"-shaped brackets that would fit around the lip of the lid and hold via a combination of gravity (when the lid is opened) and friction (when the lid is closed).
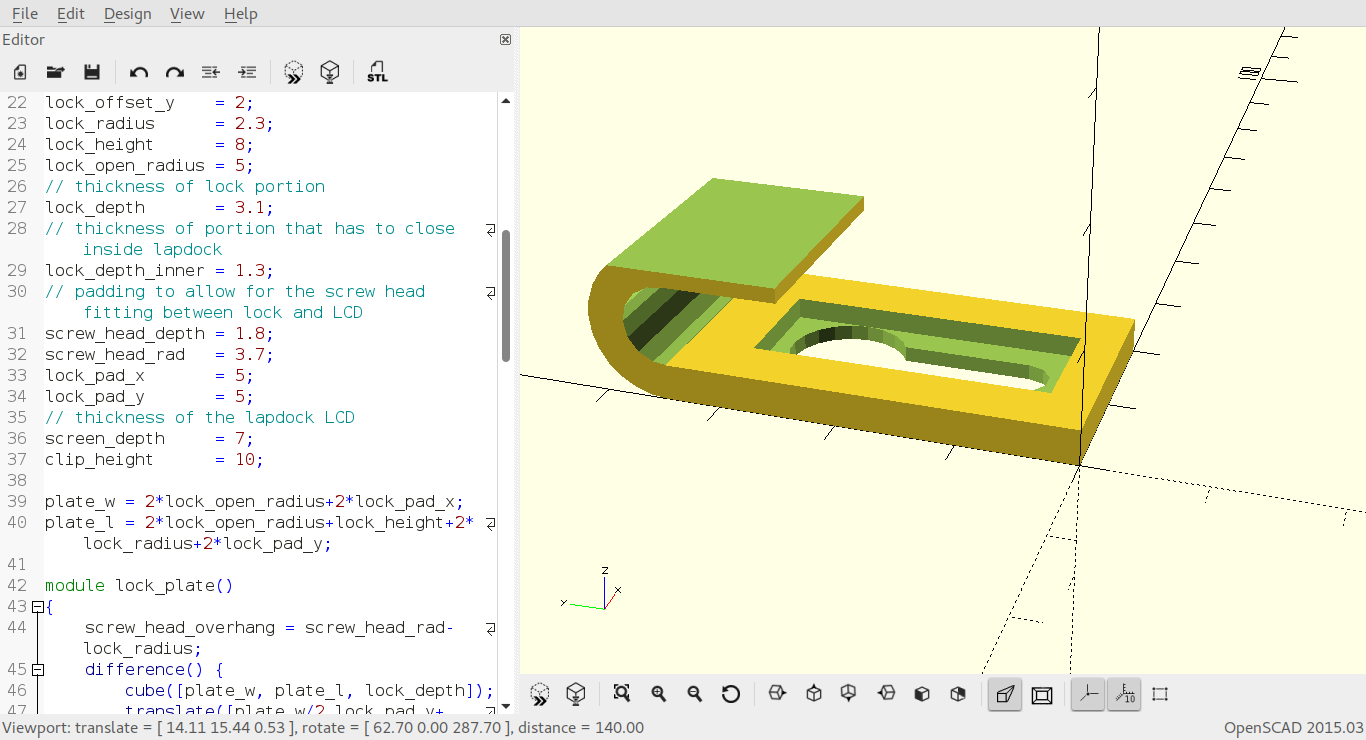 A CAD model of the bracket, made with OpenSCAD. Repository.
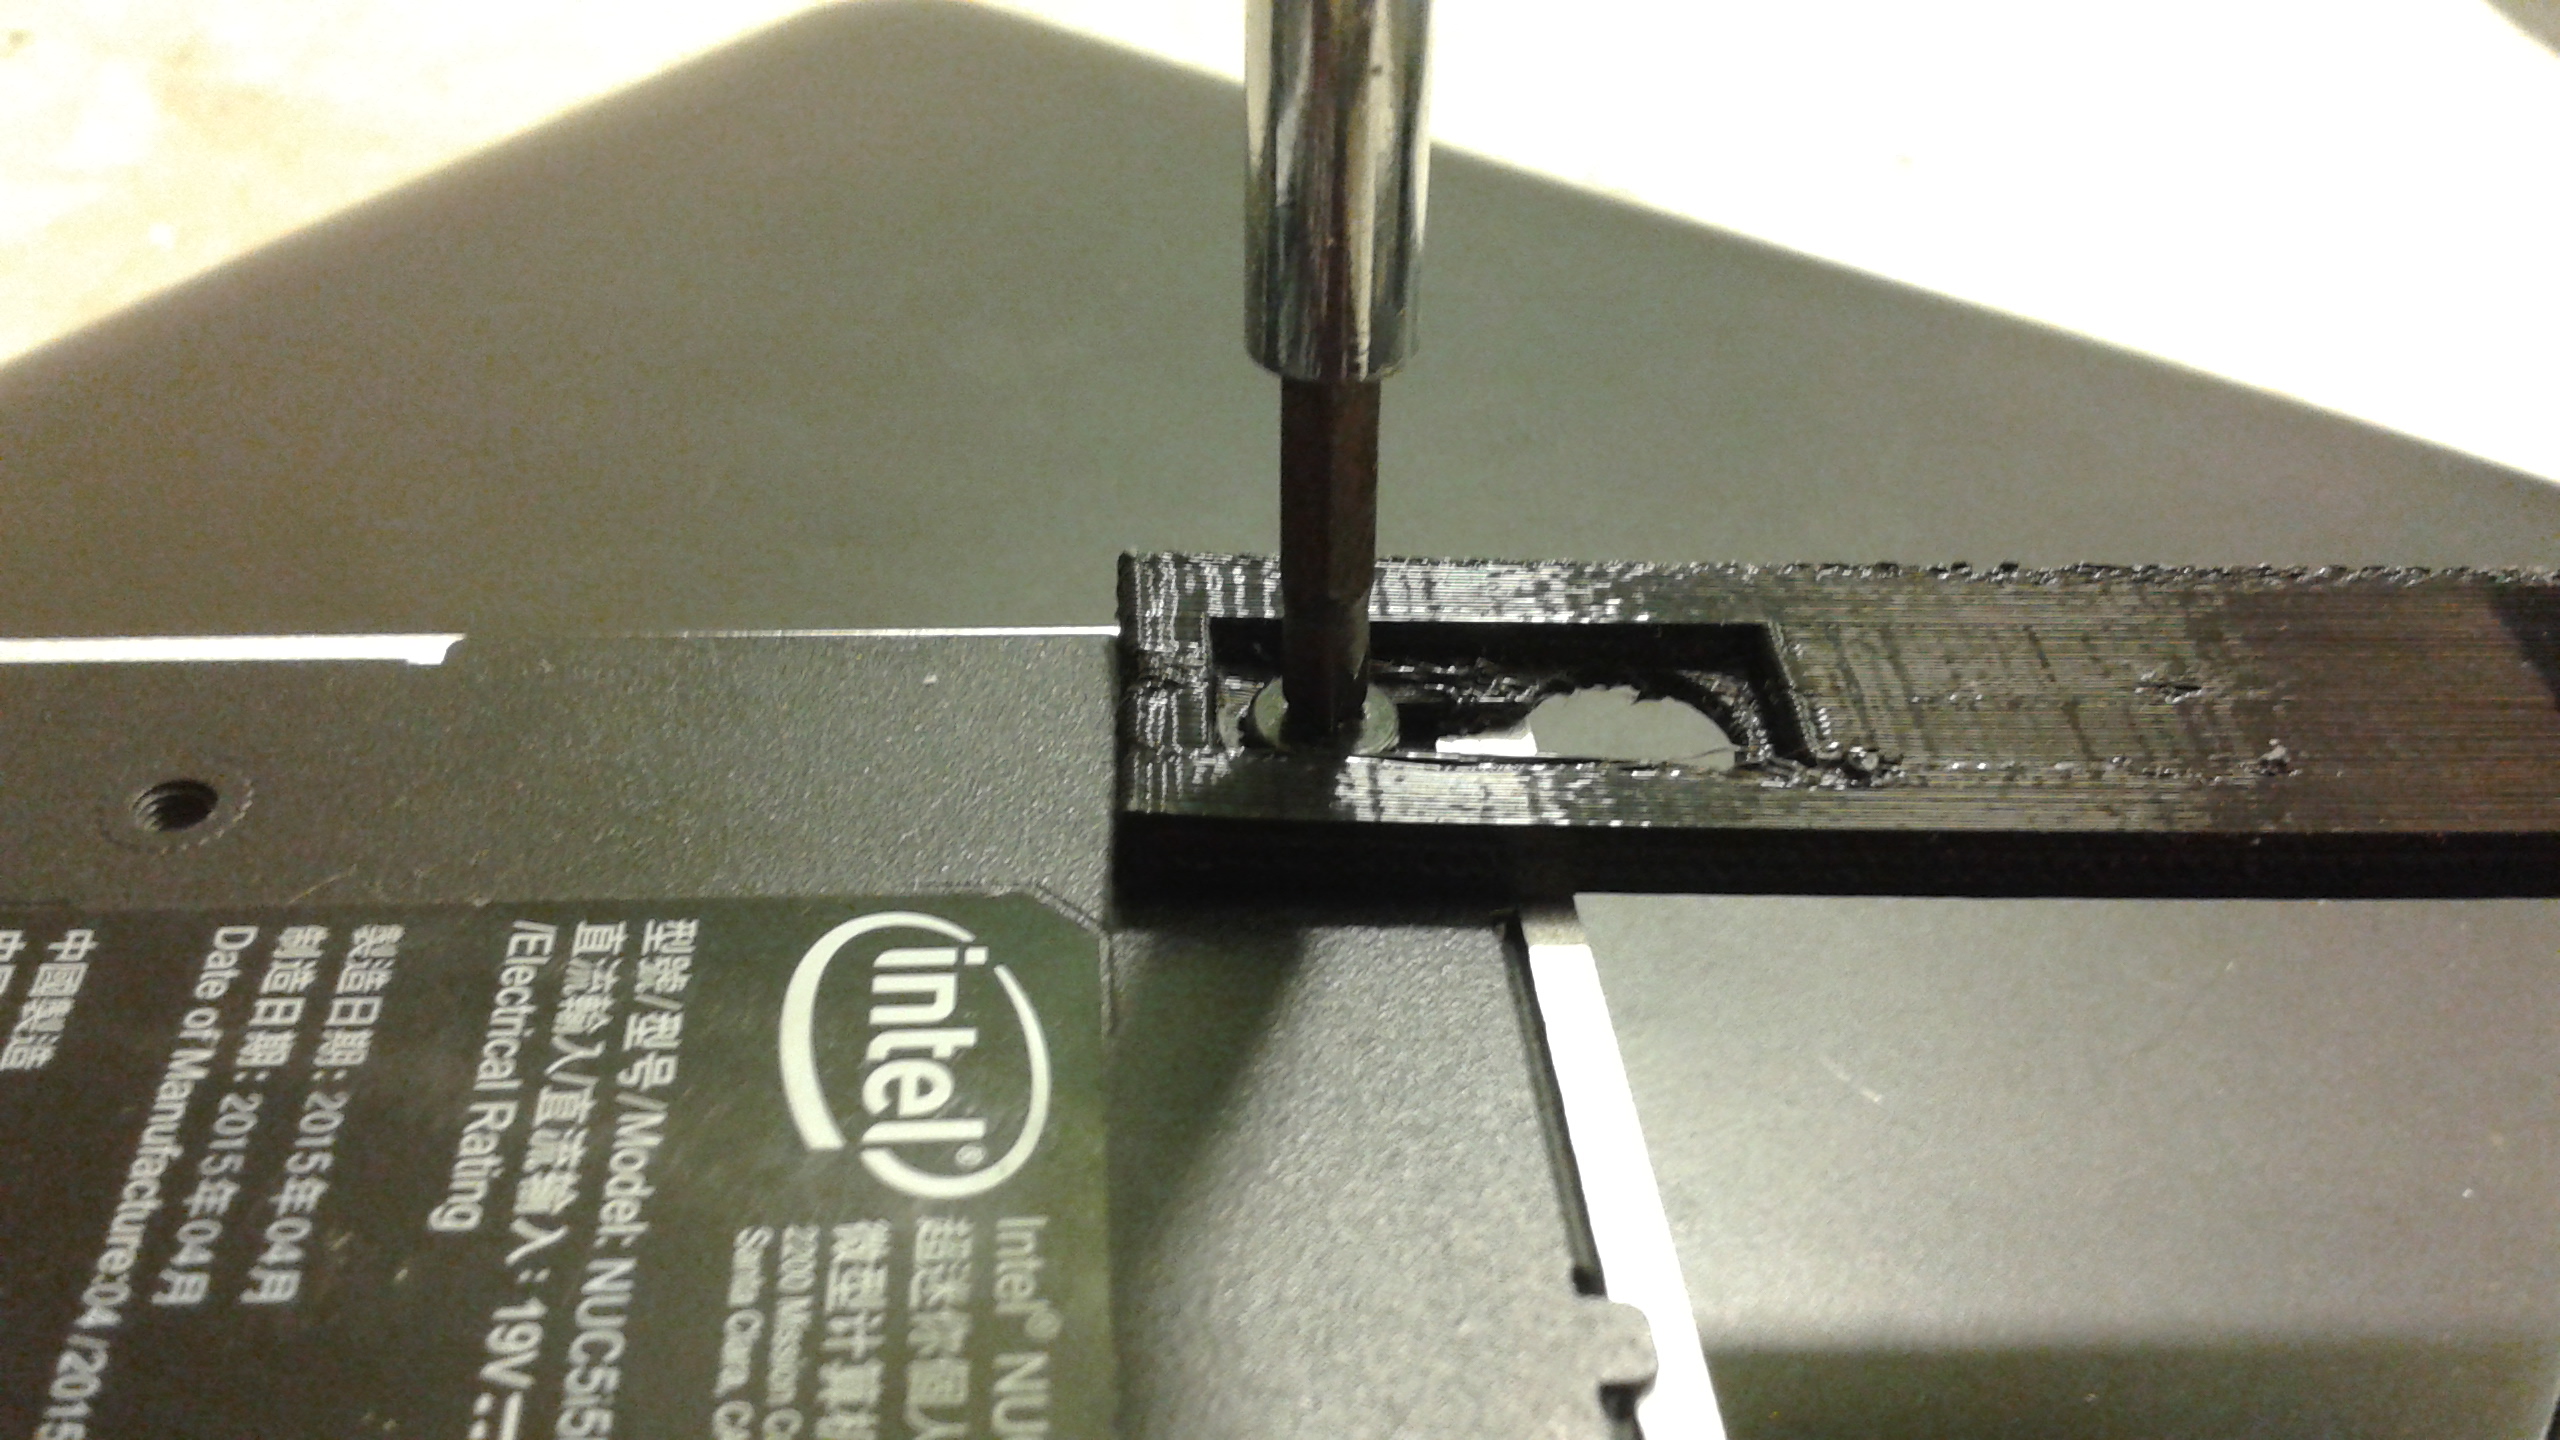
These brackets have holes at the end that are larger than the screws holding the NUC's bottom on, but smaller than the screws' heads. This should allow them to be securely fastened onto the bottom of the NUC.
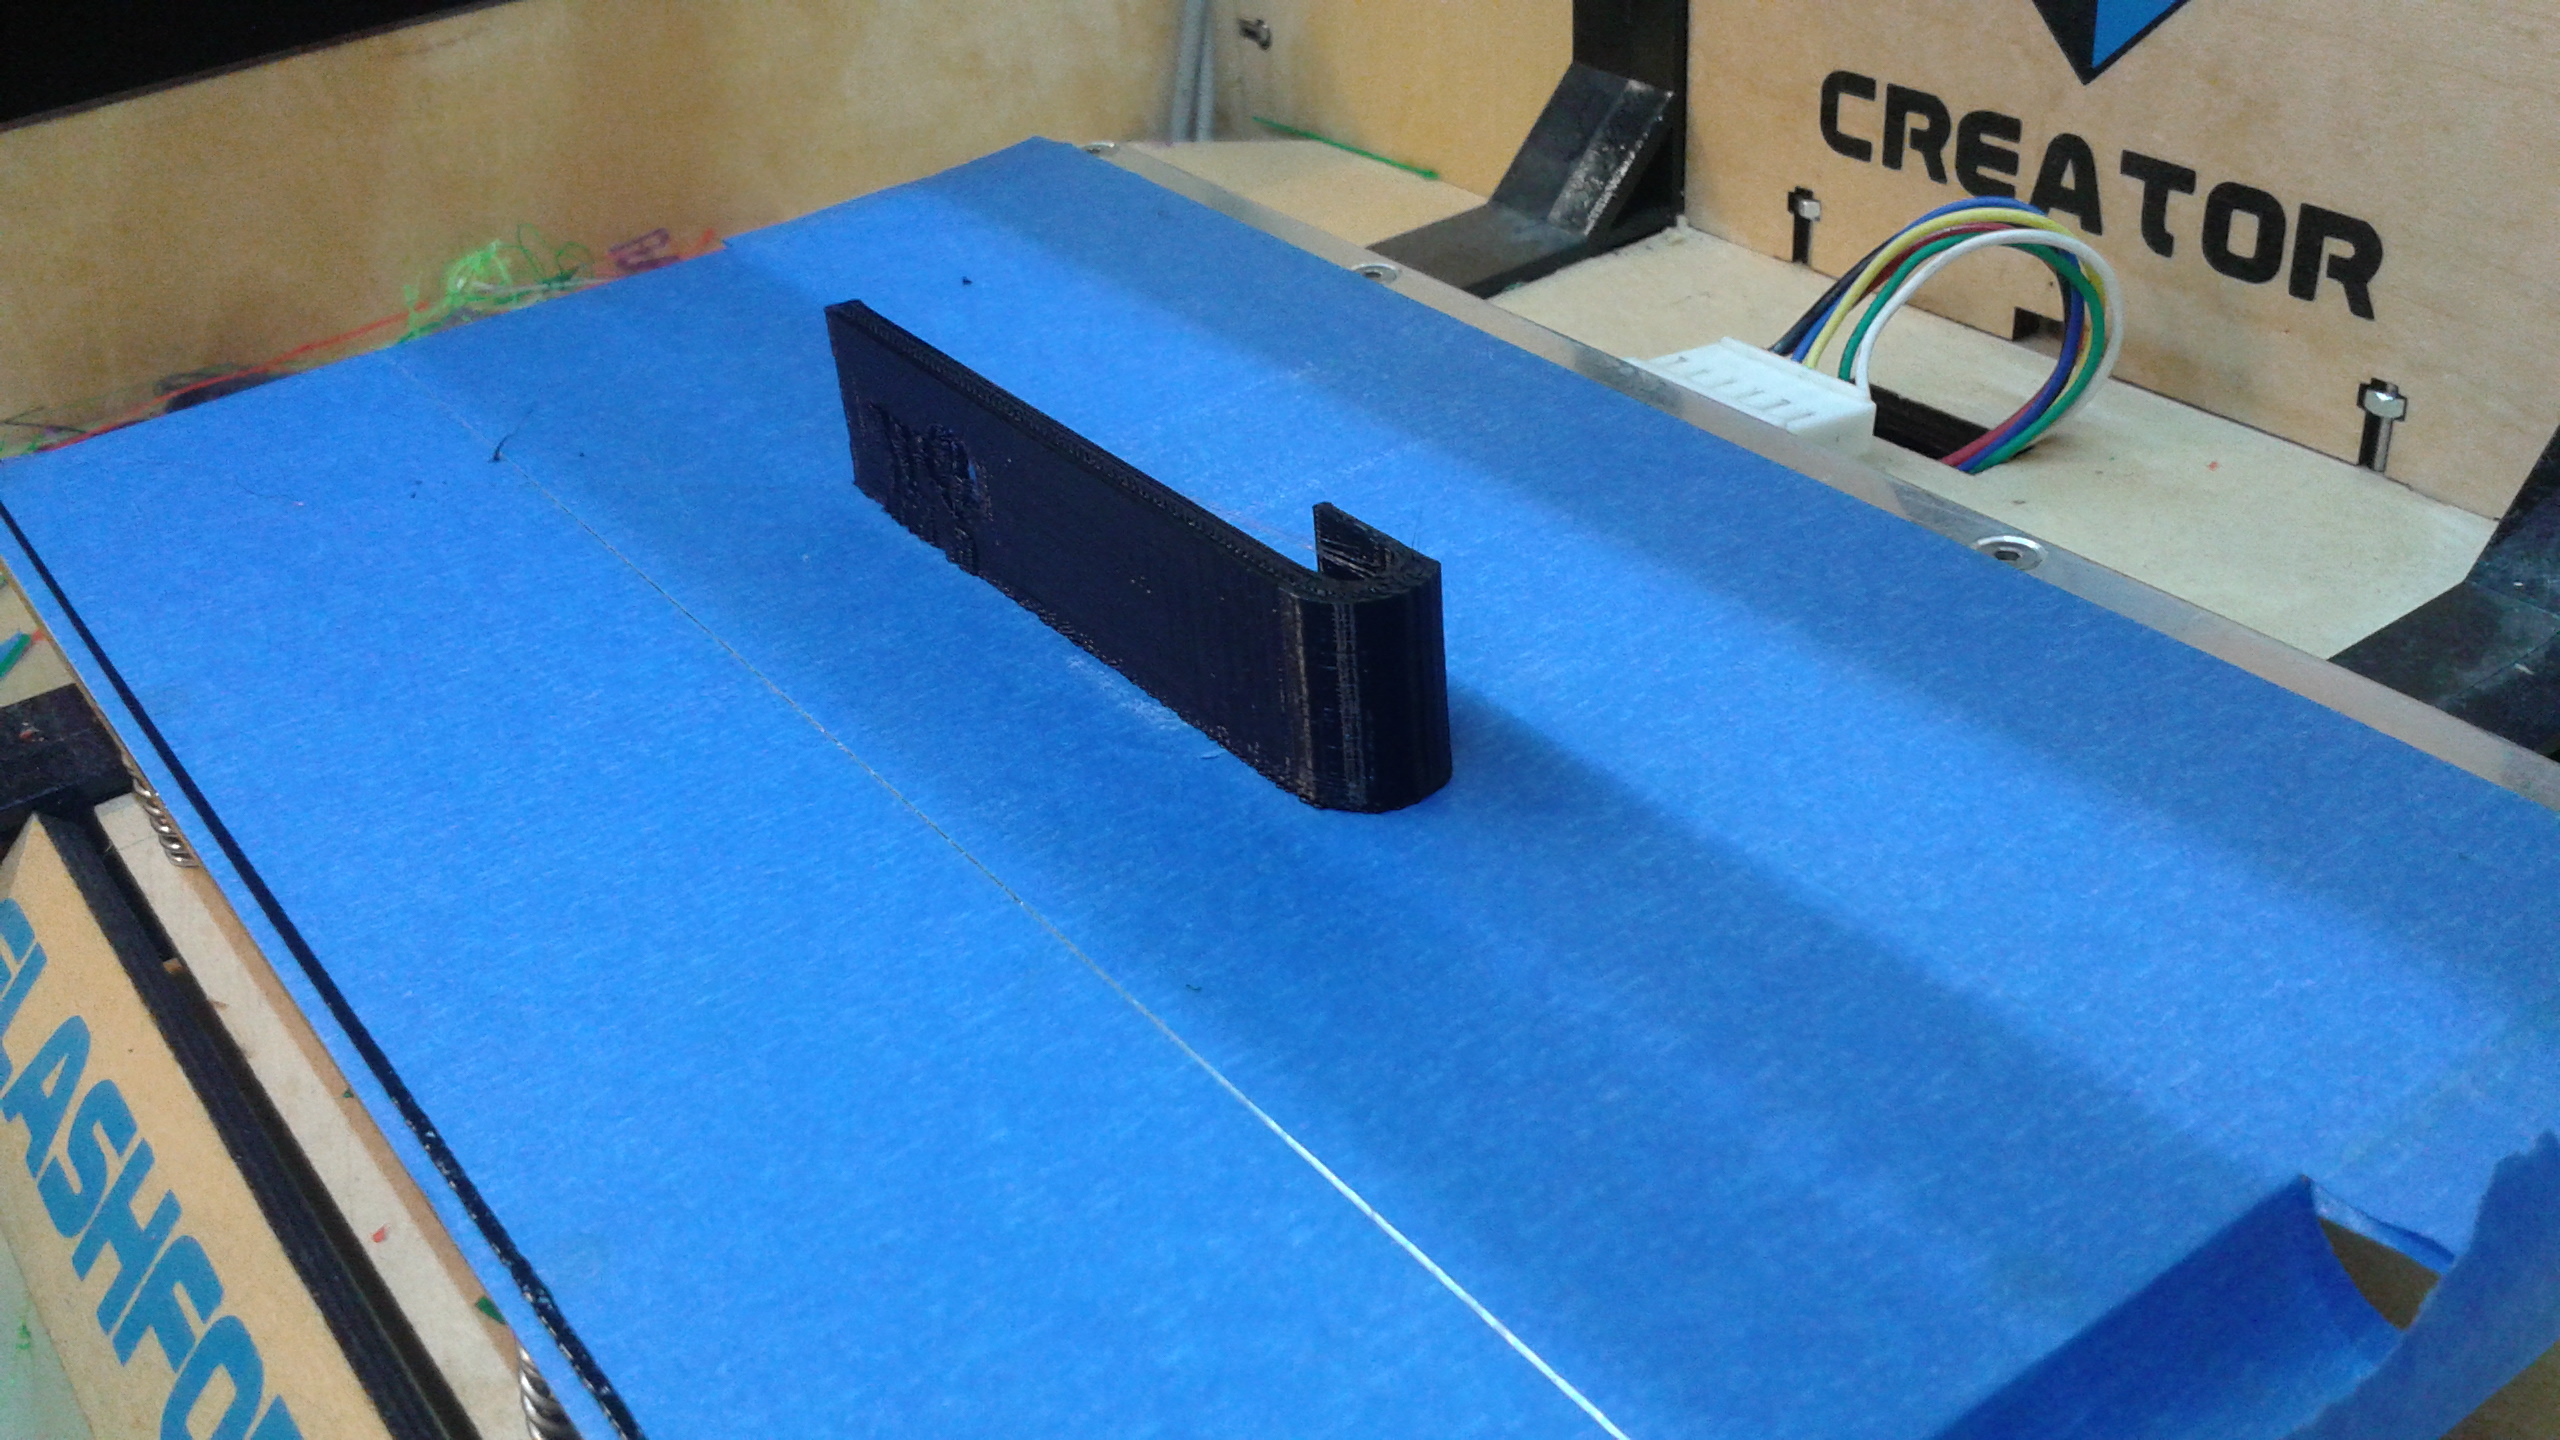
Since I have access to a 3d printer, I figured it would make sense to use one to fabricate a prototype.
These brackets attach to the NUC like so:
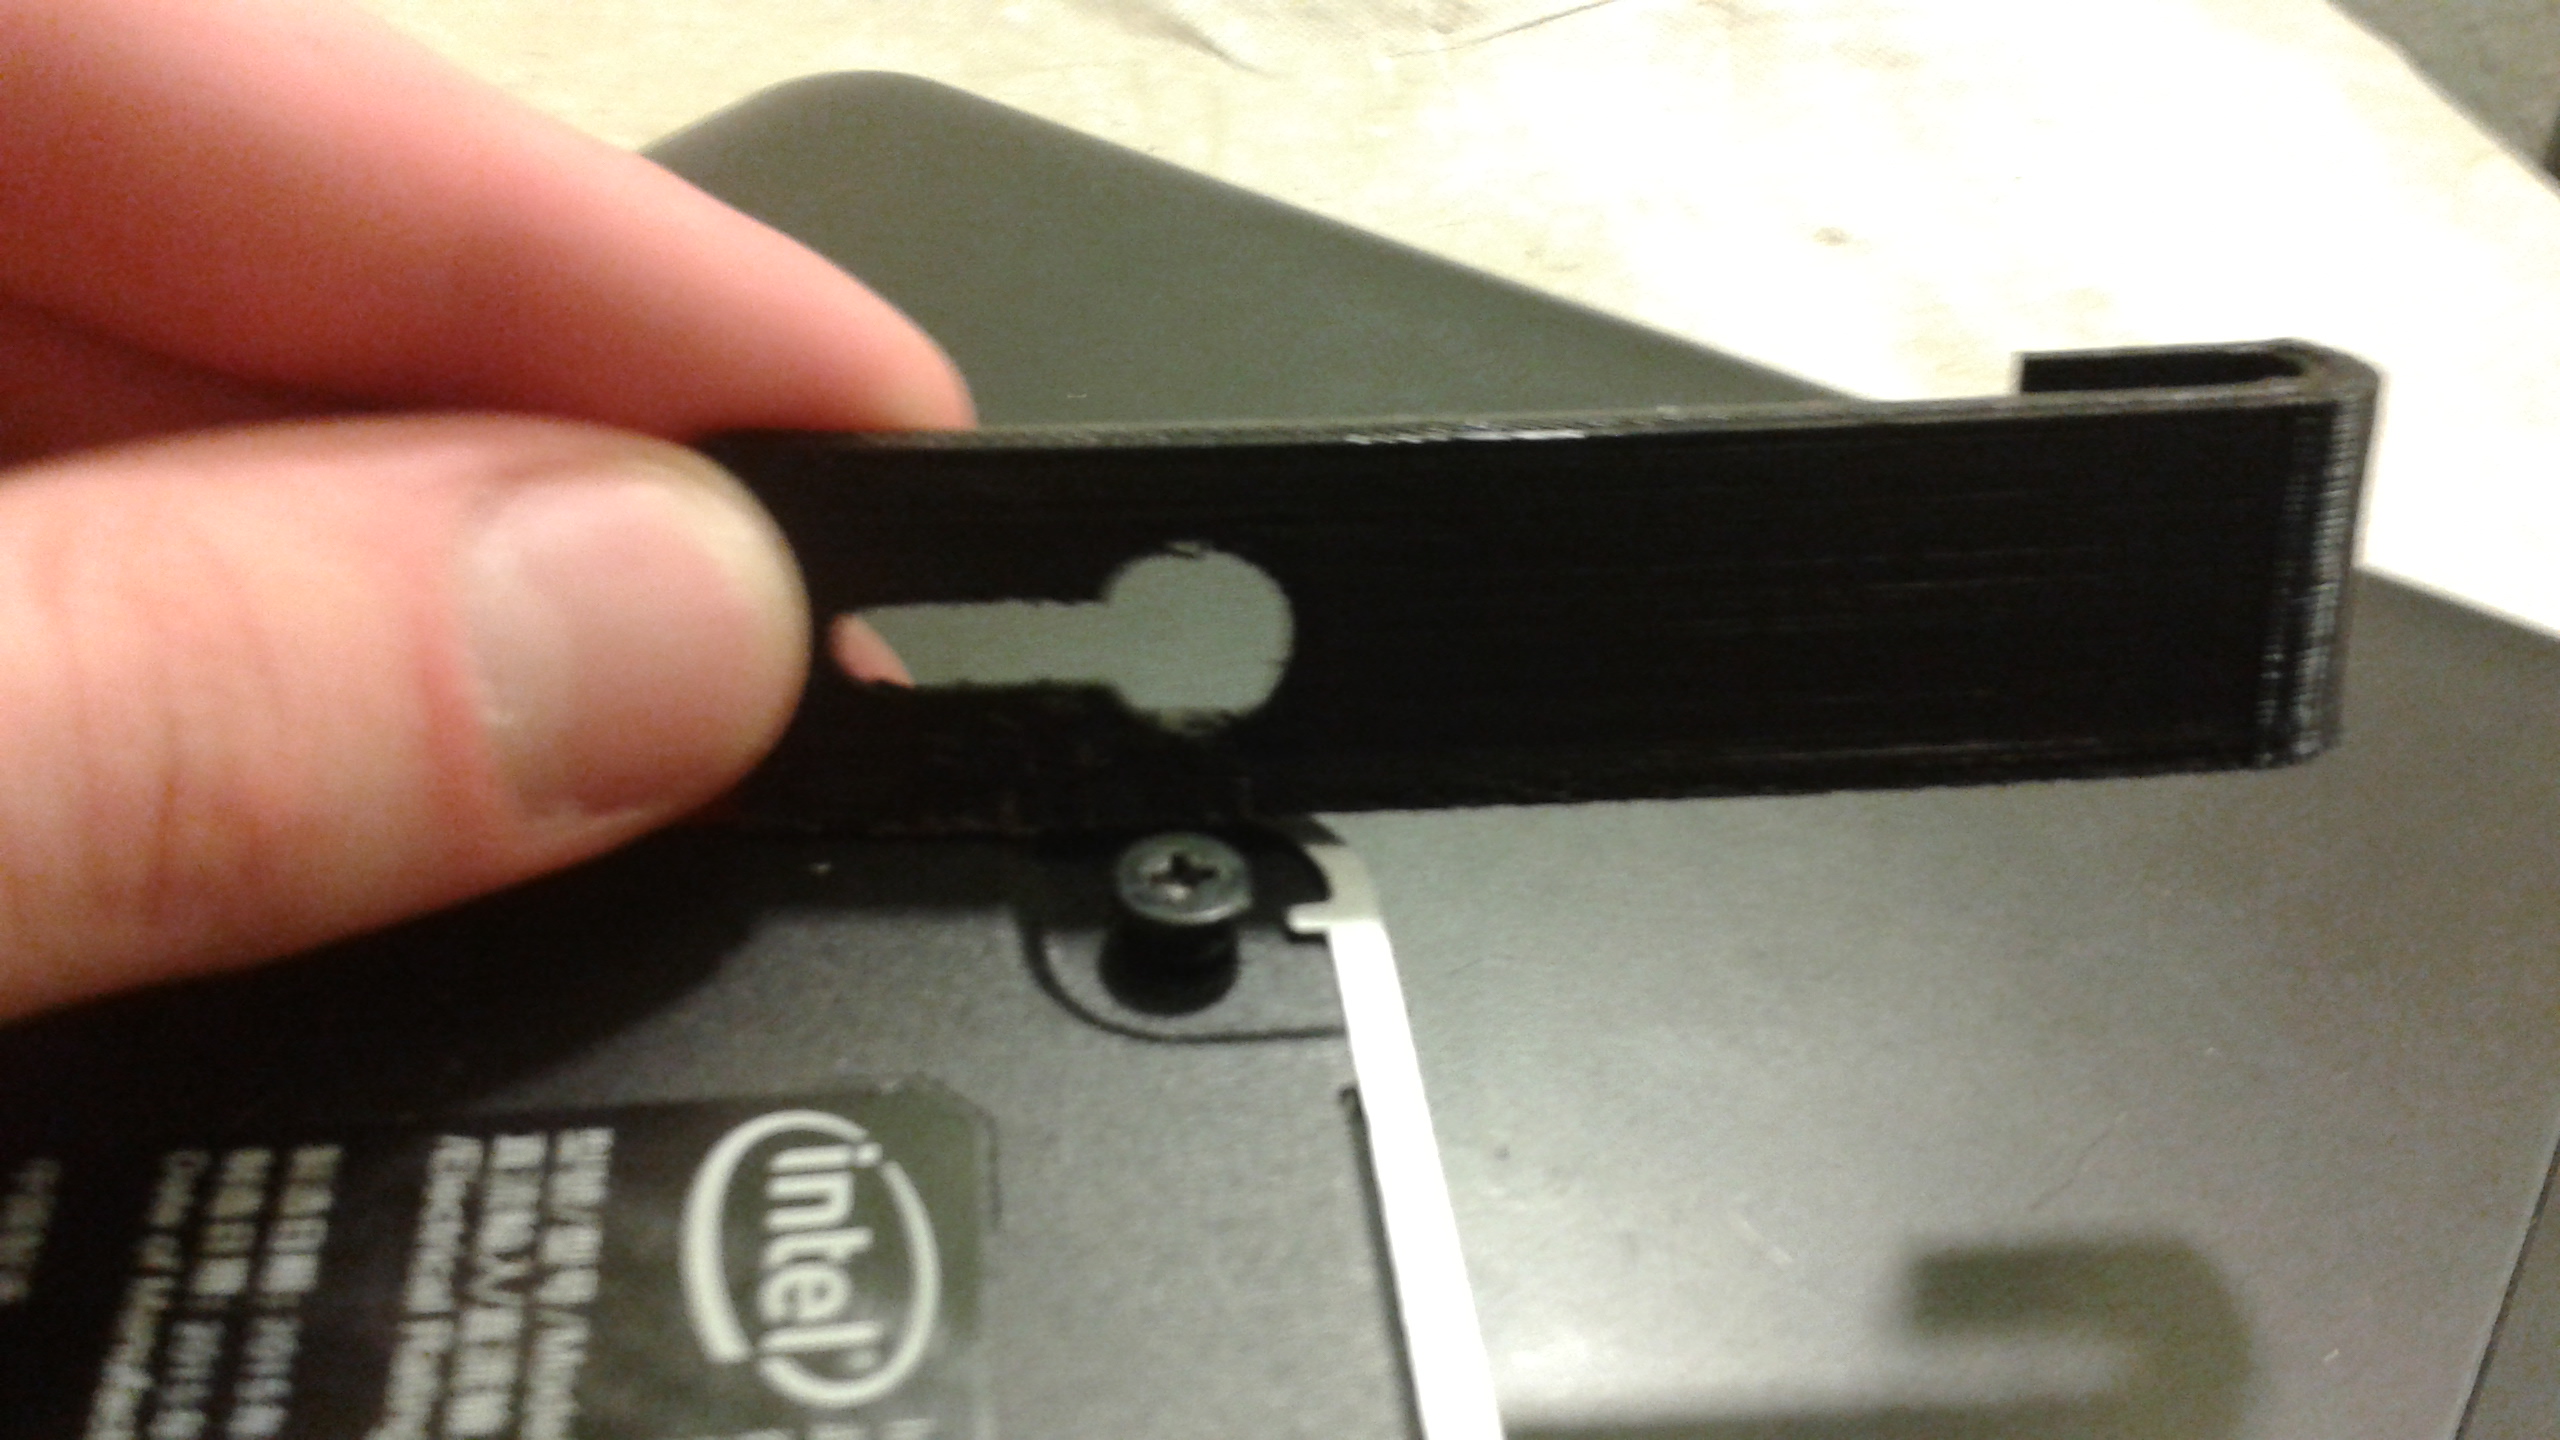
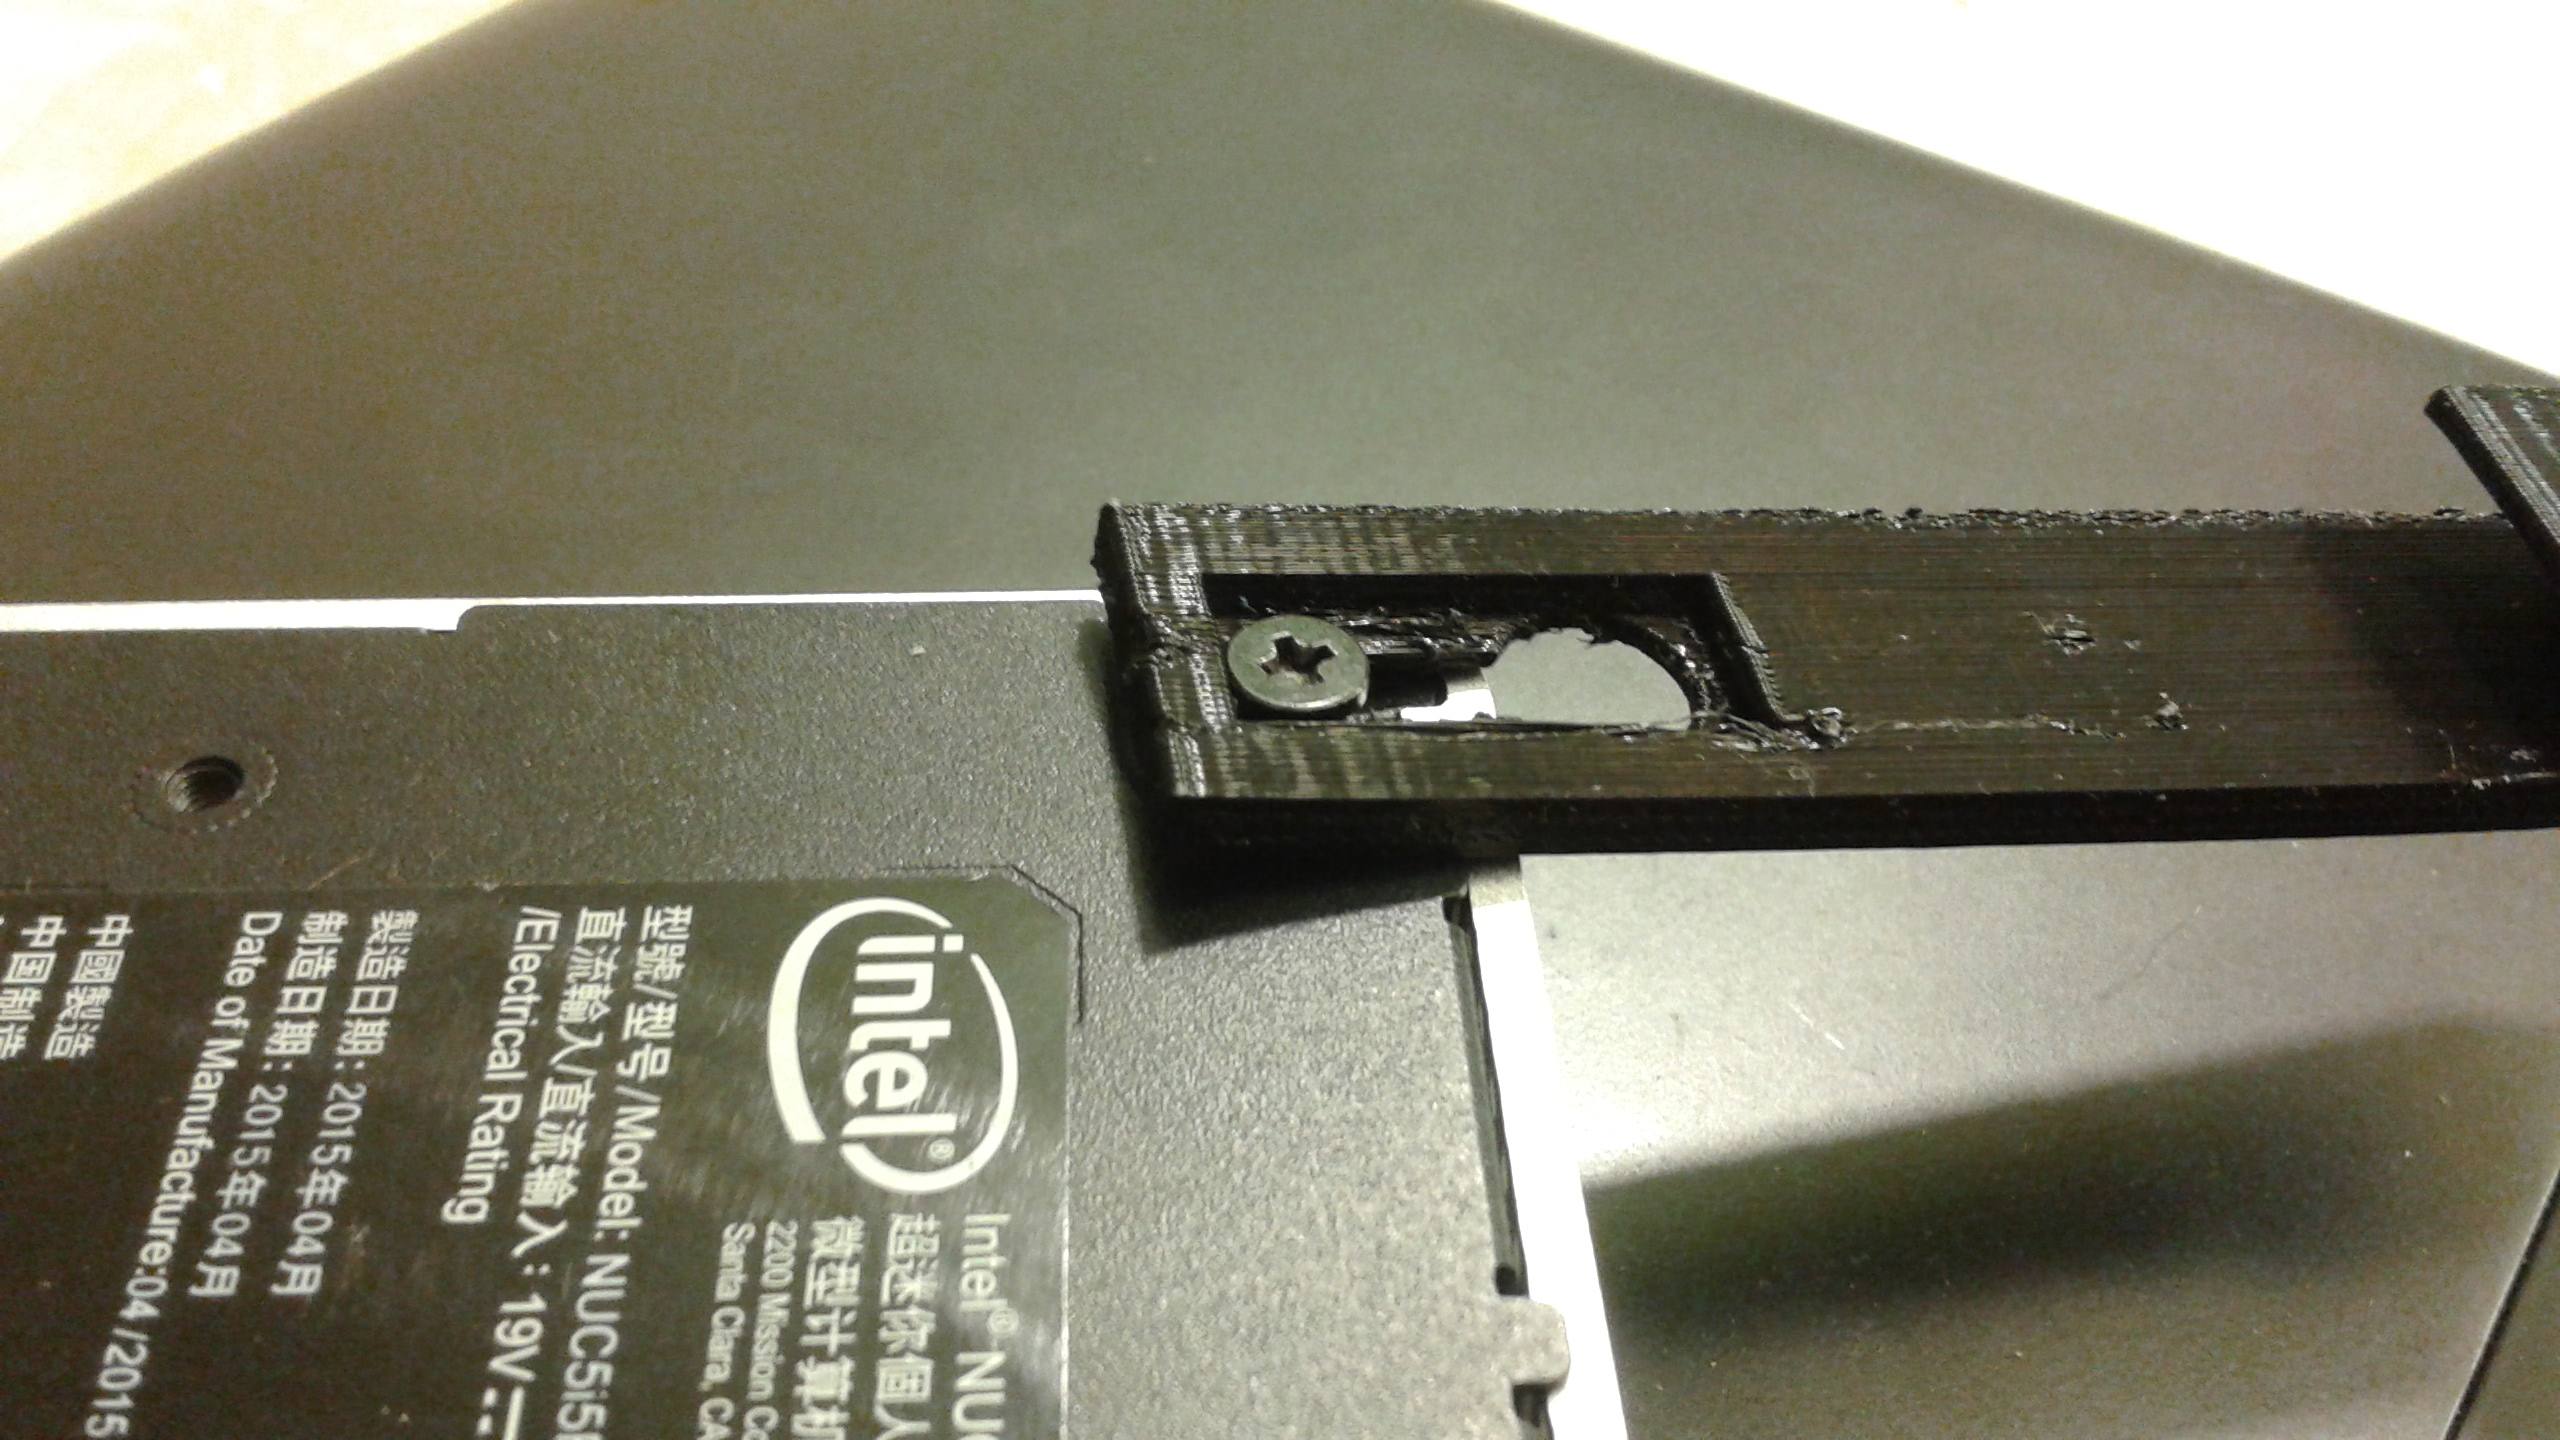
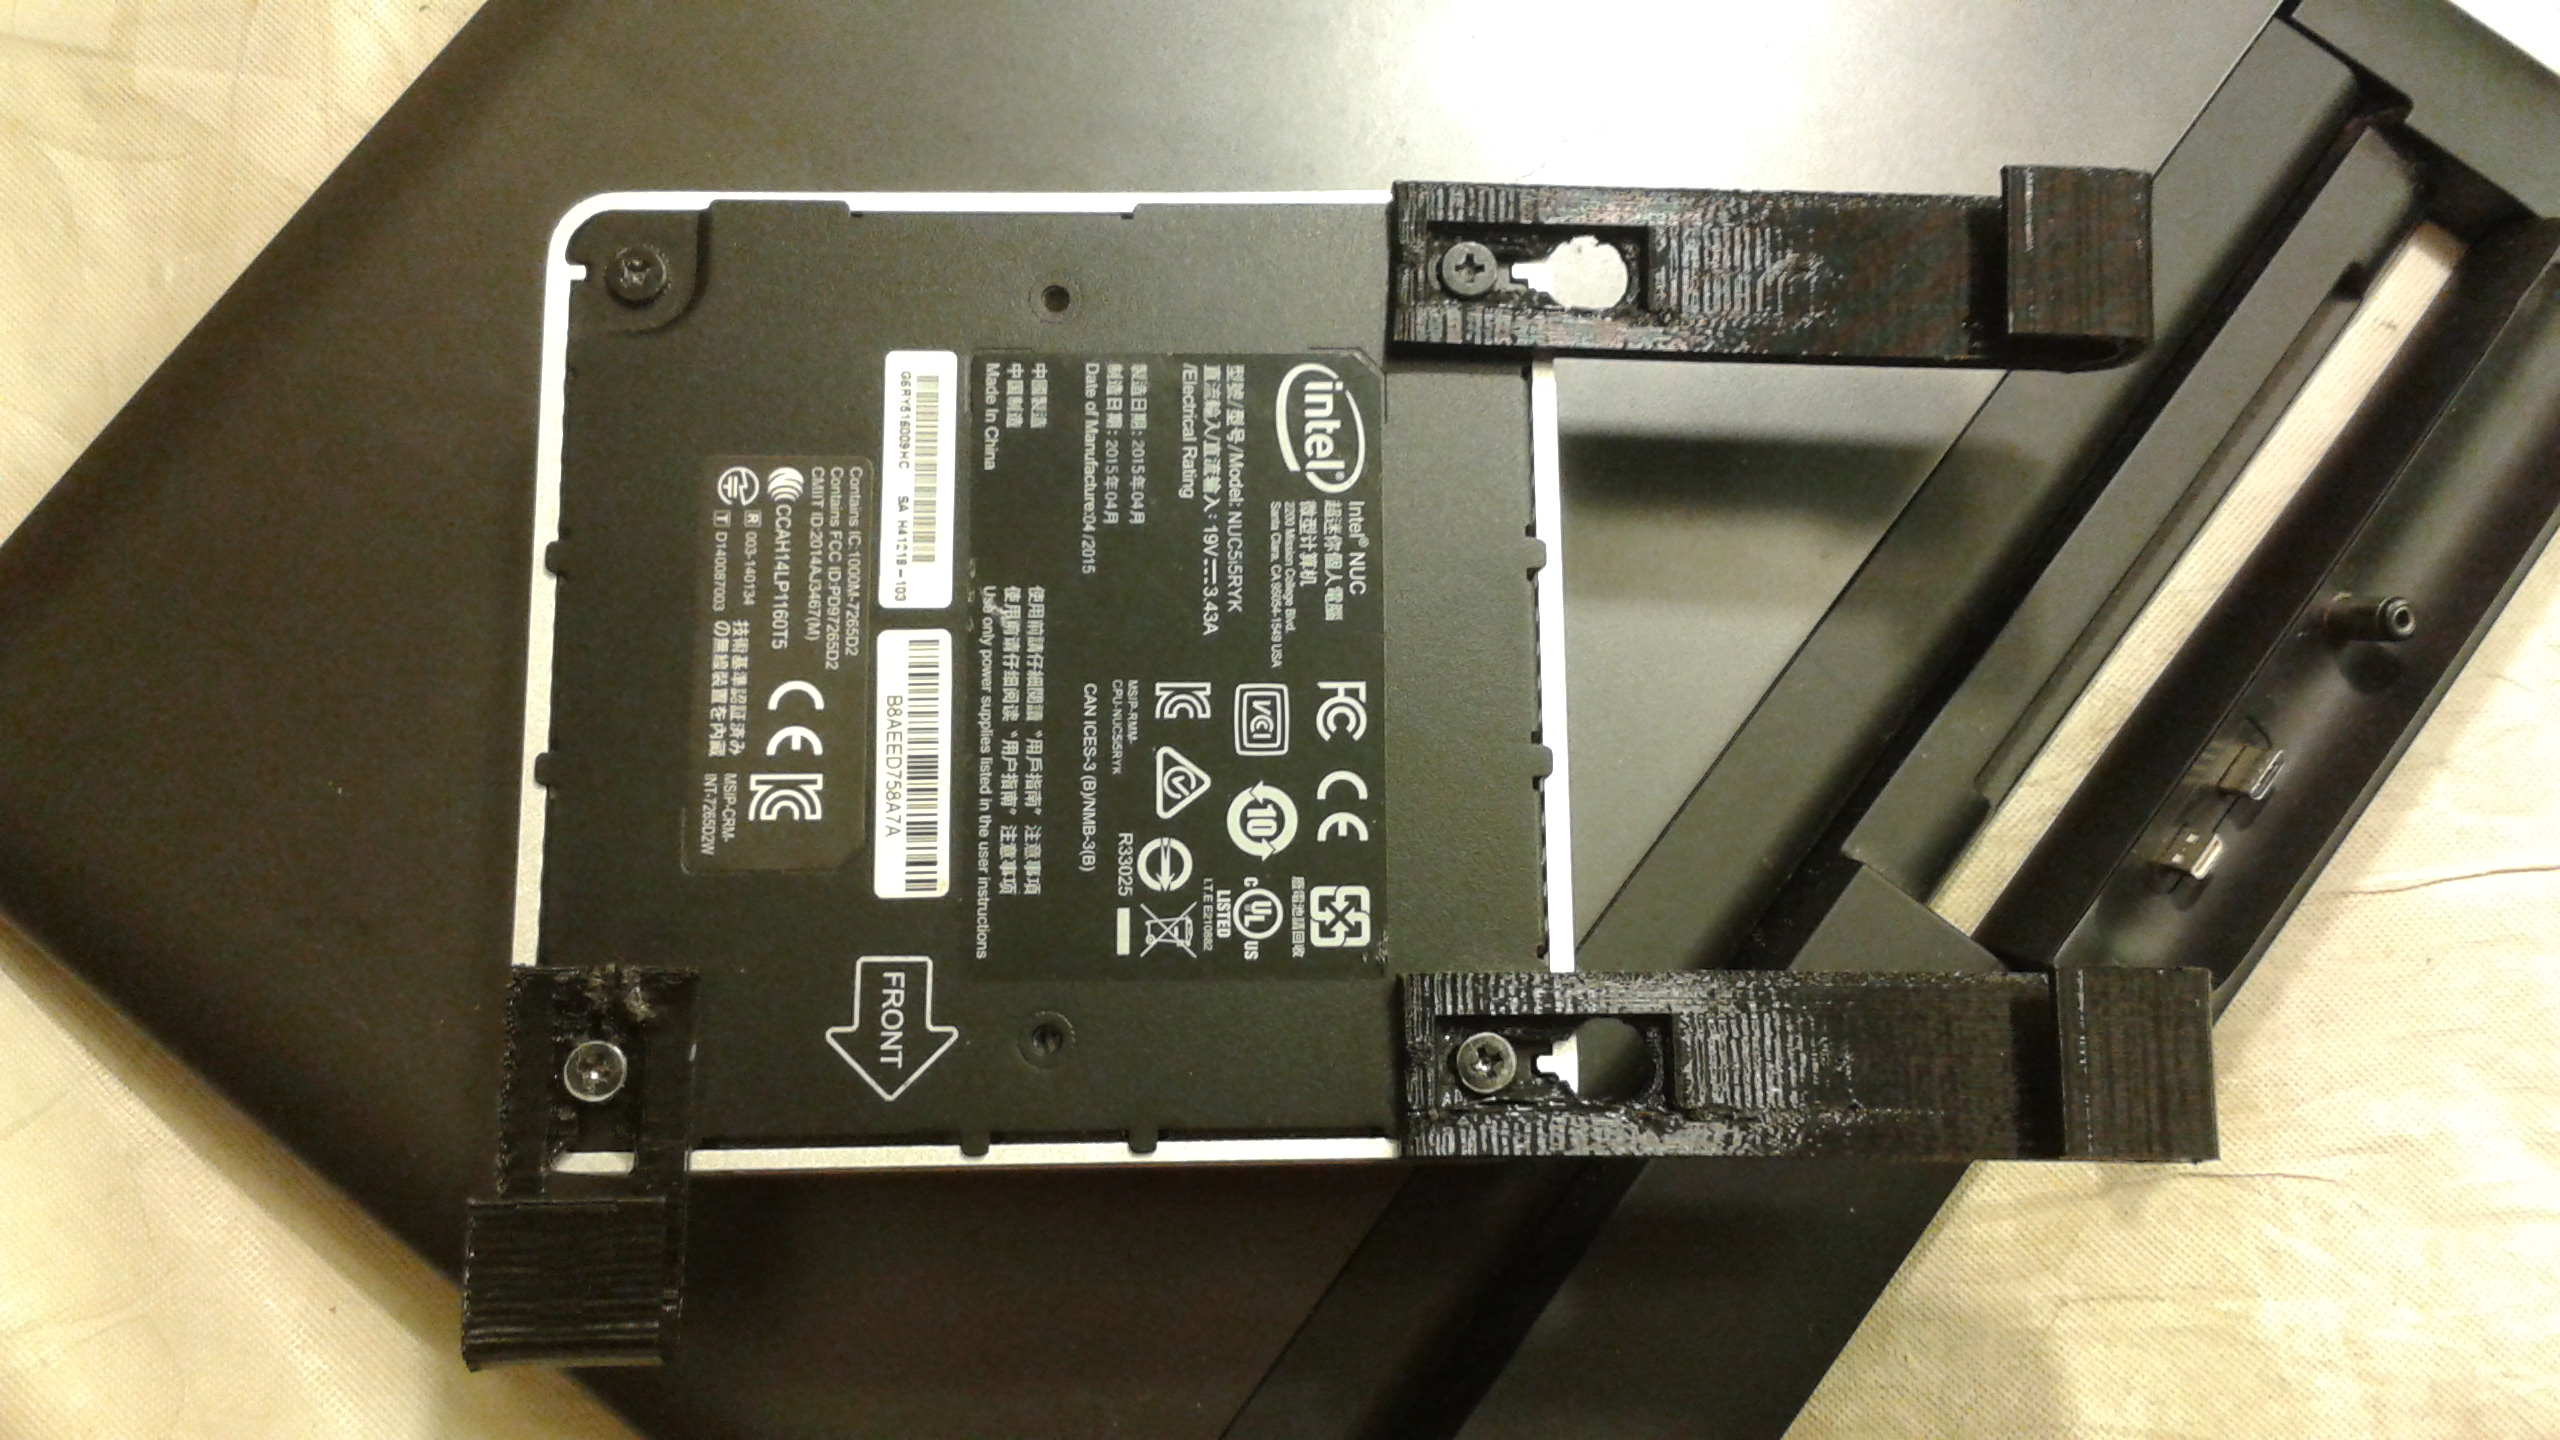 Notice how there are two bracket sizes; the longer brackets connect to the top of the lapdock, whereas the shorter one clamps to the side.
Then the whole thing fits snugly around the lapdock, and it still closes comfortably.

Improving the Power Delivery
With that complete, it's time to refine the power routing. The prototype had a pair of wires jammed into empty slots (i.e. friction-fit) of a connector on the battery circuitboard that just happened to be connected to power, and then a dangling cord sticking out the back of the lapdock, even when the NUC was detached.
An improvement would be to solder a permanent connection inside the lapdock and bring this out to a socket near the USB/HDMI connectors, and then make the final connection to the NUC via a short extension cable.
So I re-opened the lapdock and soldered wires onto the main board this time, right near the point where it's delivered over the ribbon cable.
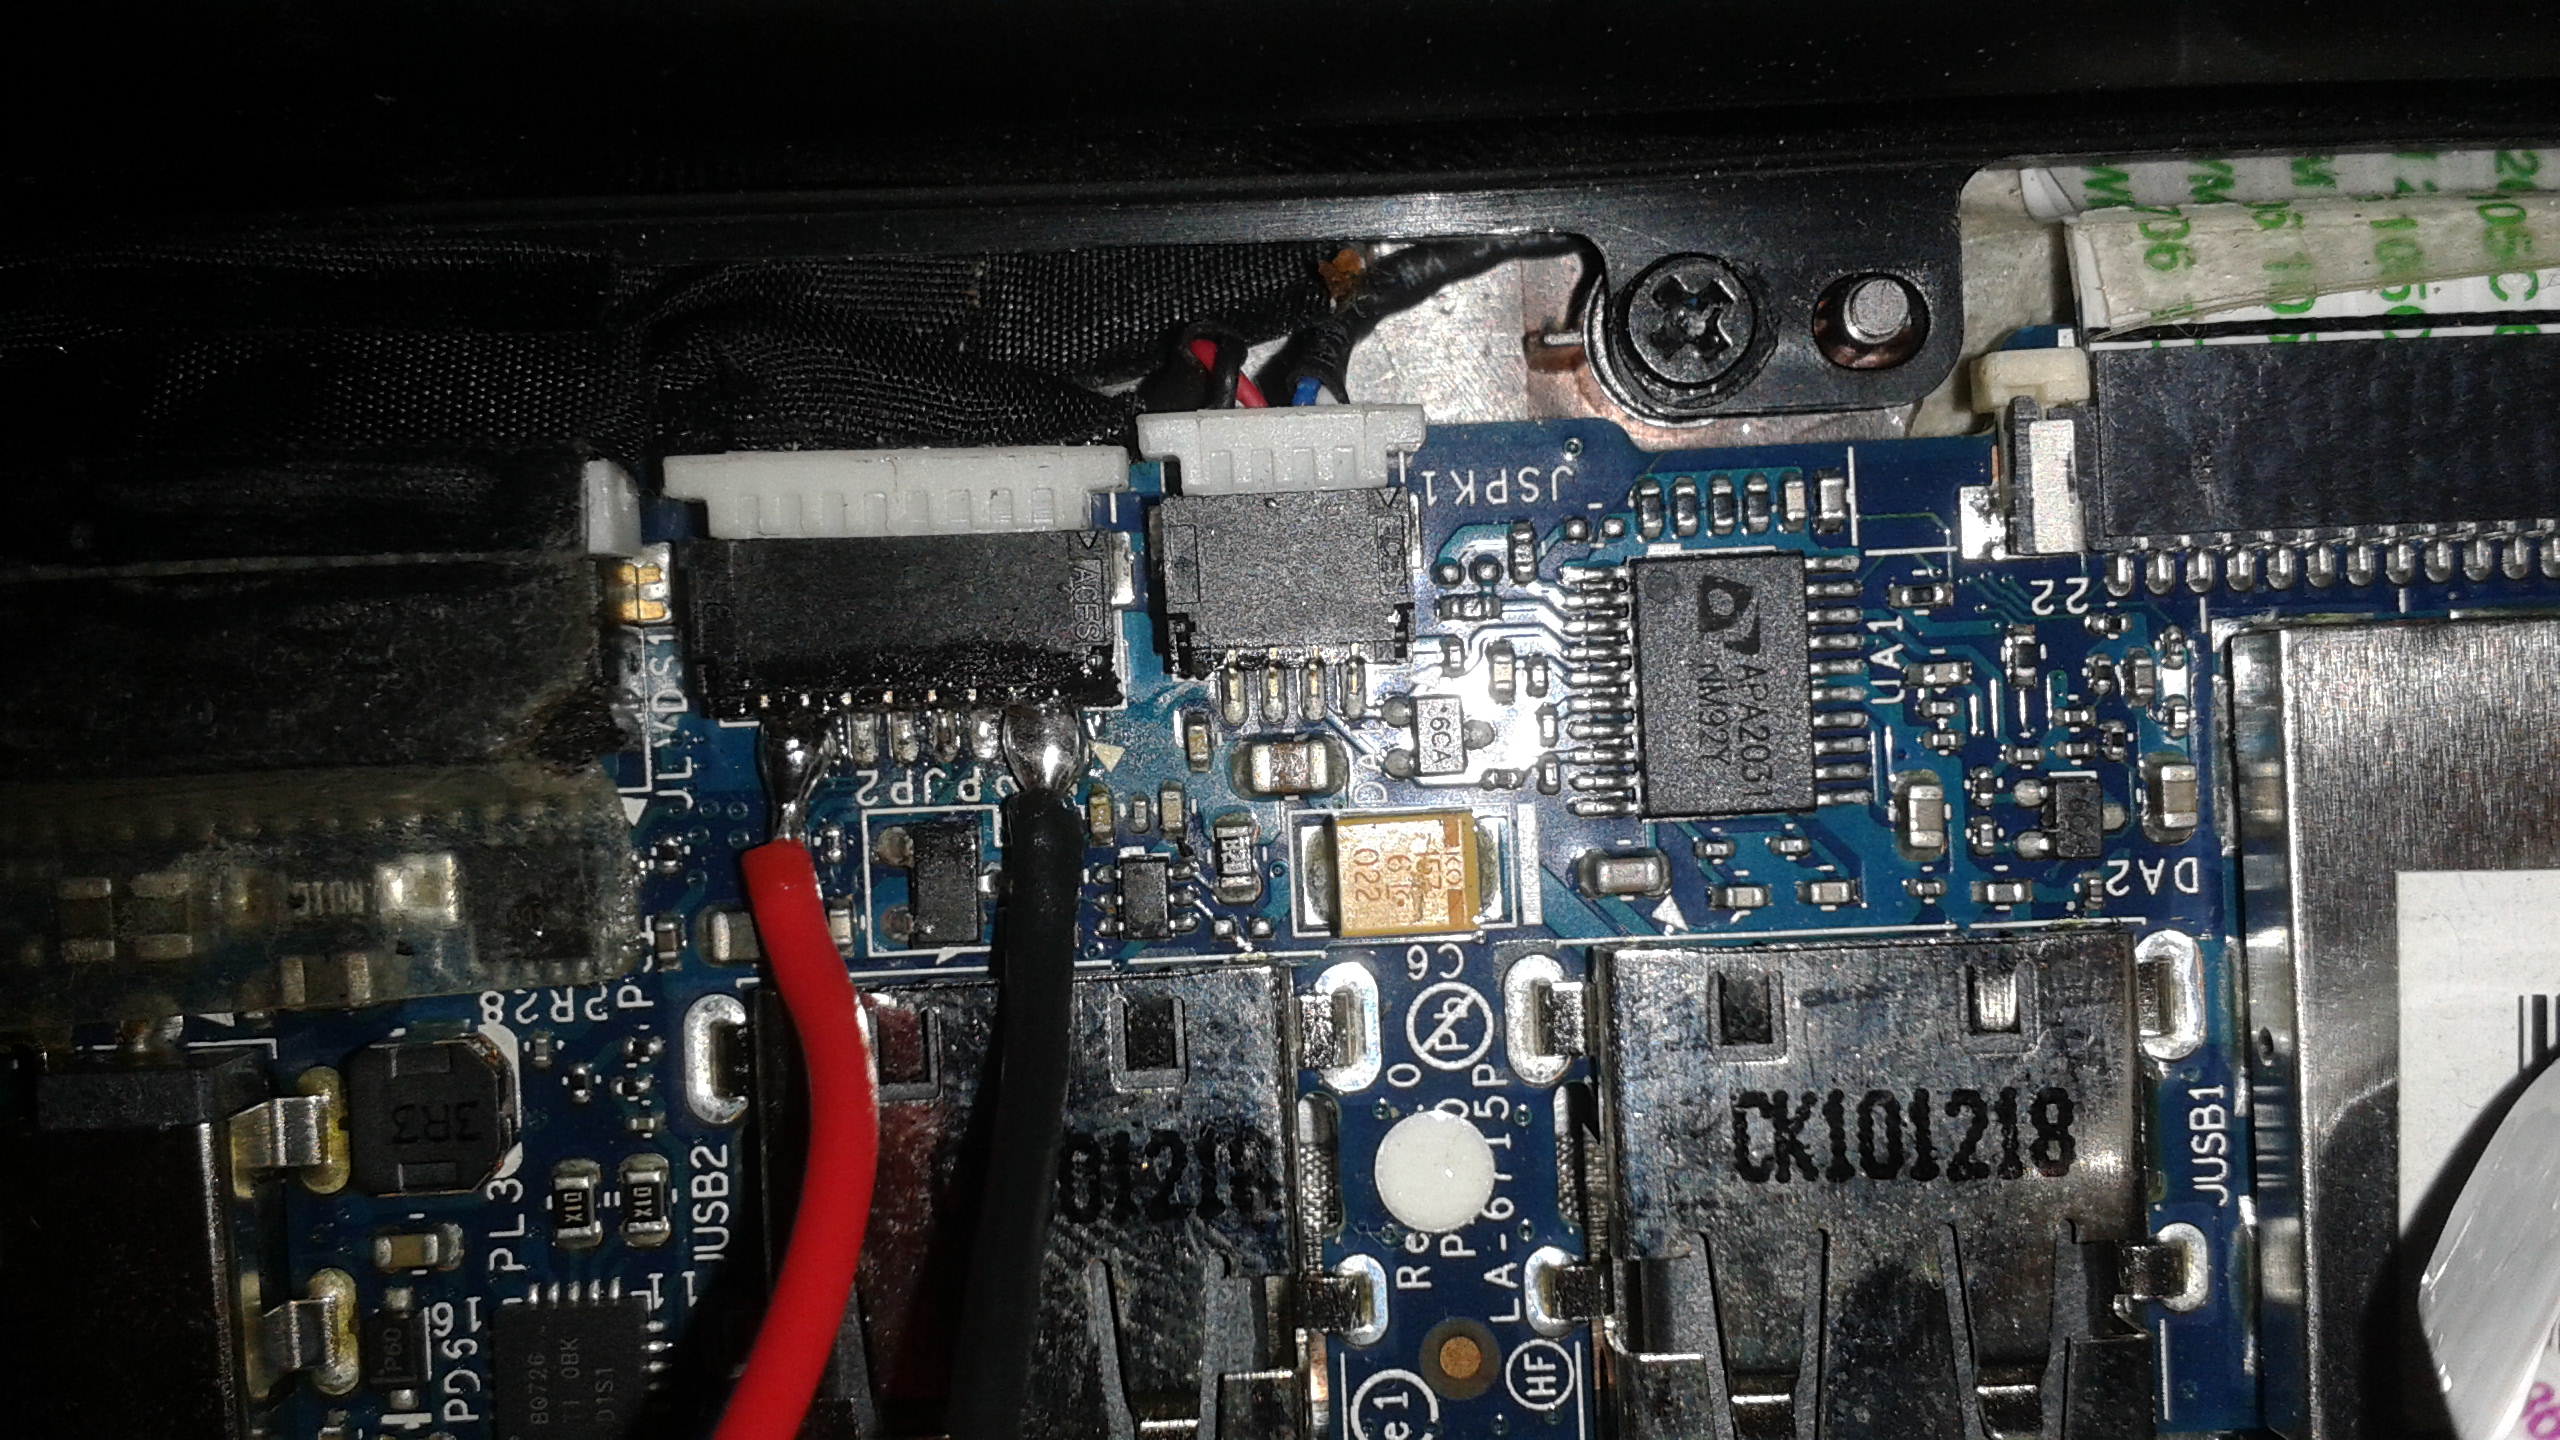 The two lanes on each edge of the connector carry power (i.e. 2 carry positive voltage and 2 carry ground). Be sure to unplug the ribbon cable before doing this so there's no possibility of shorting the battery.
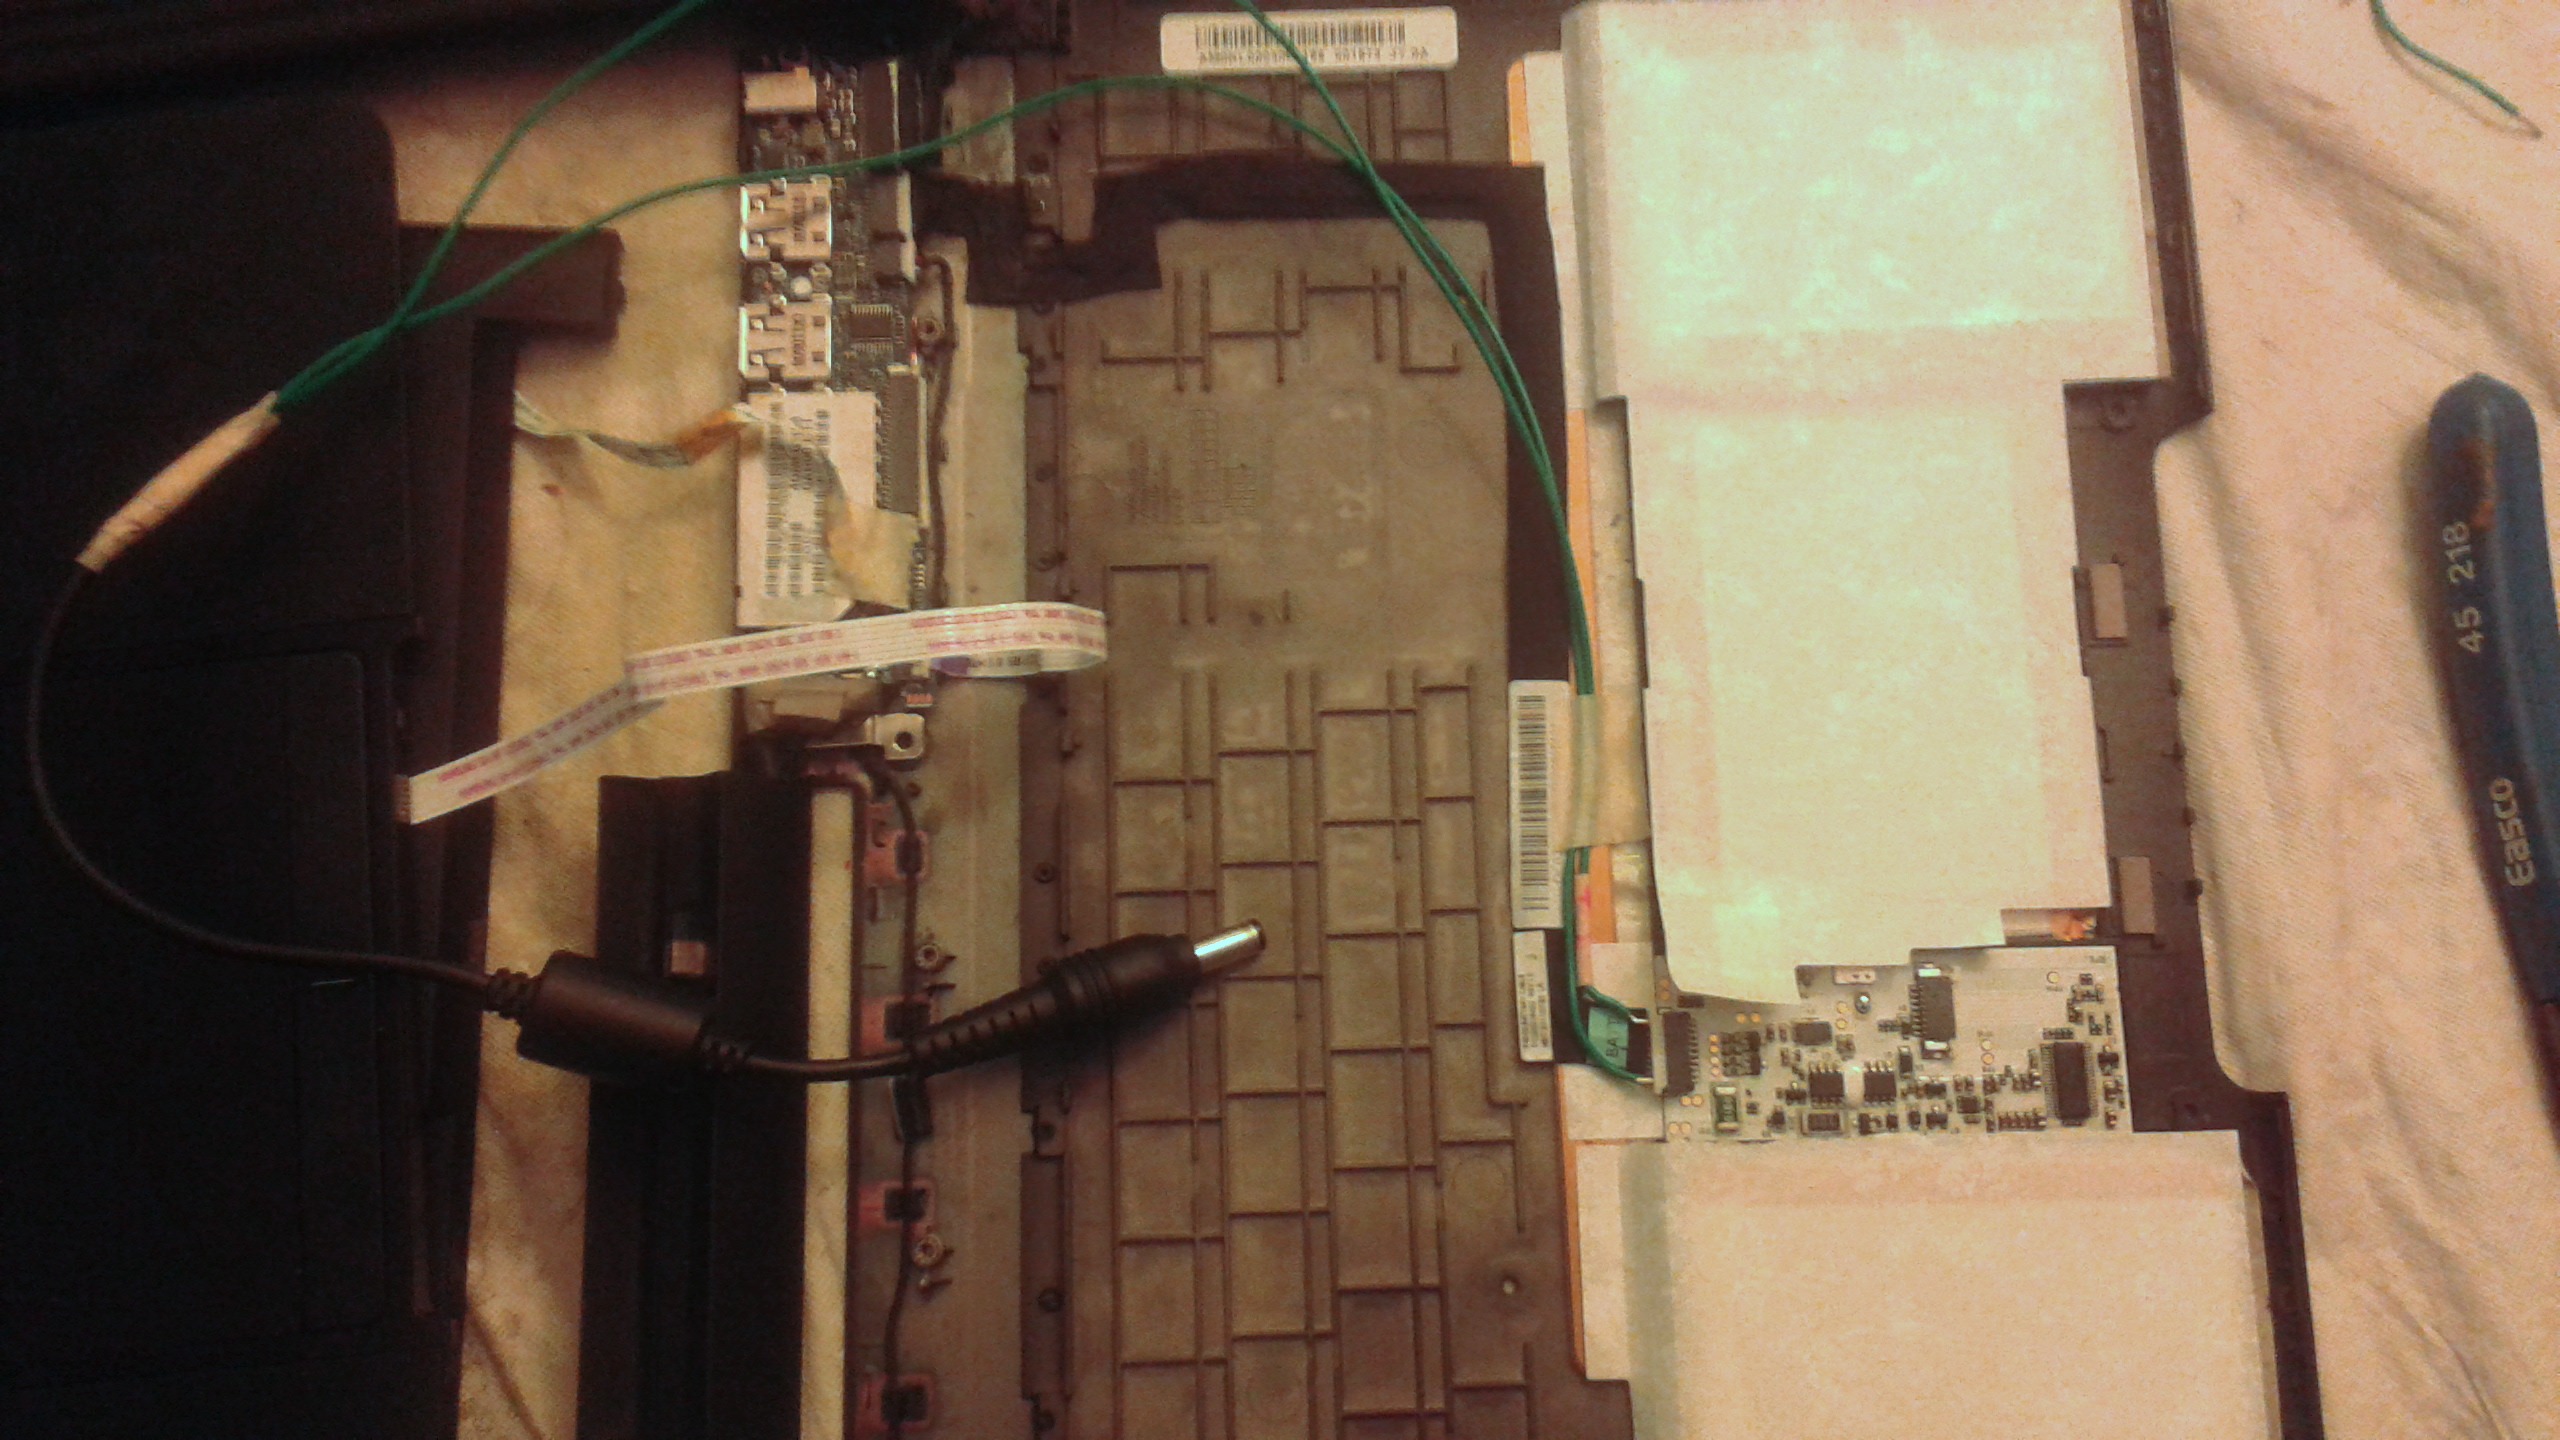
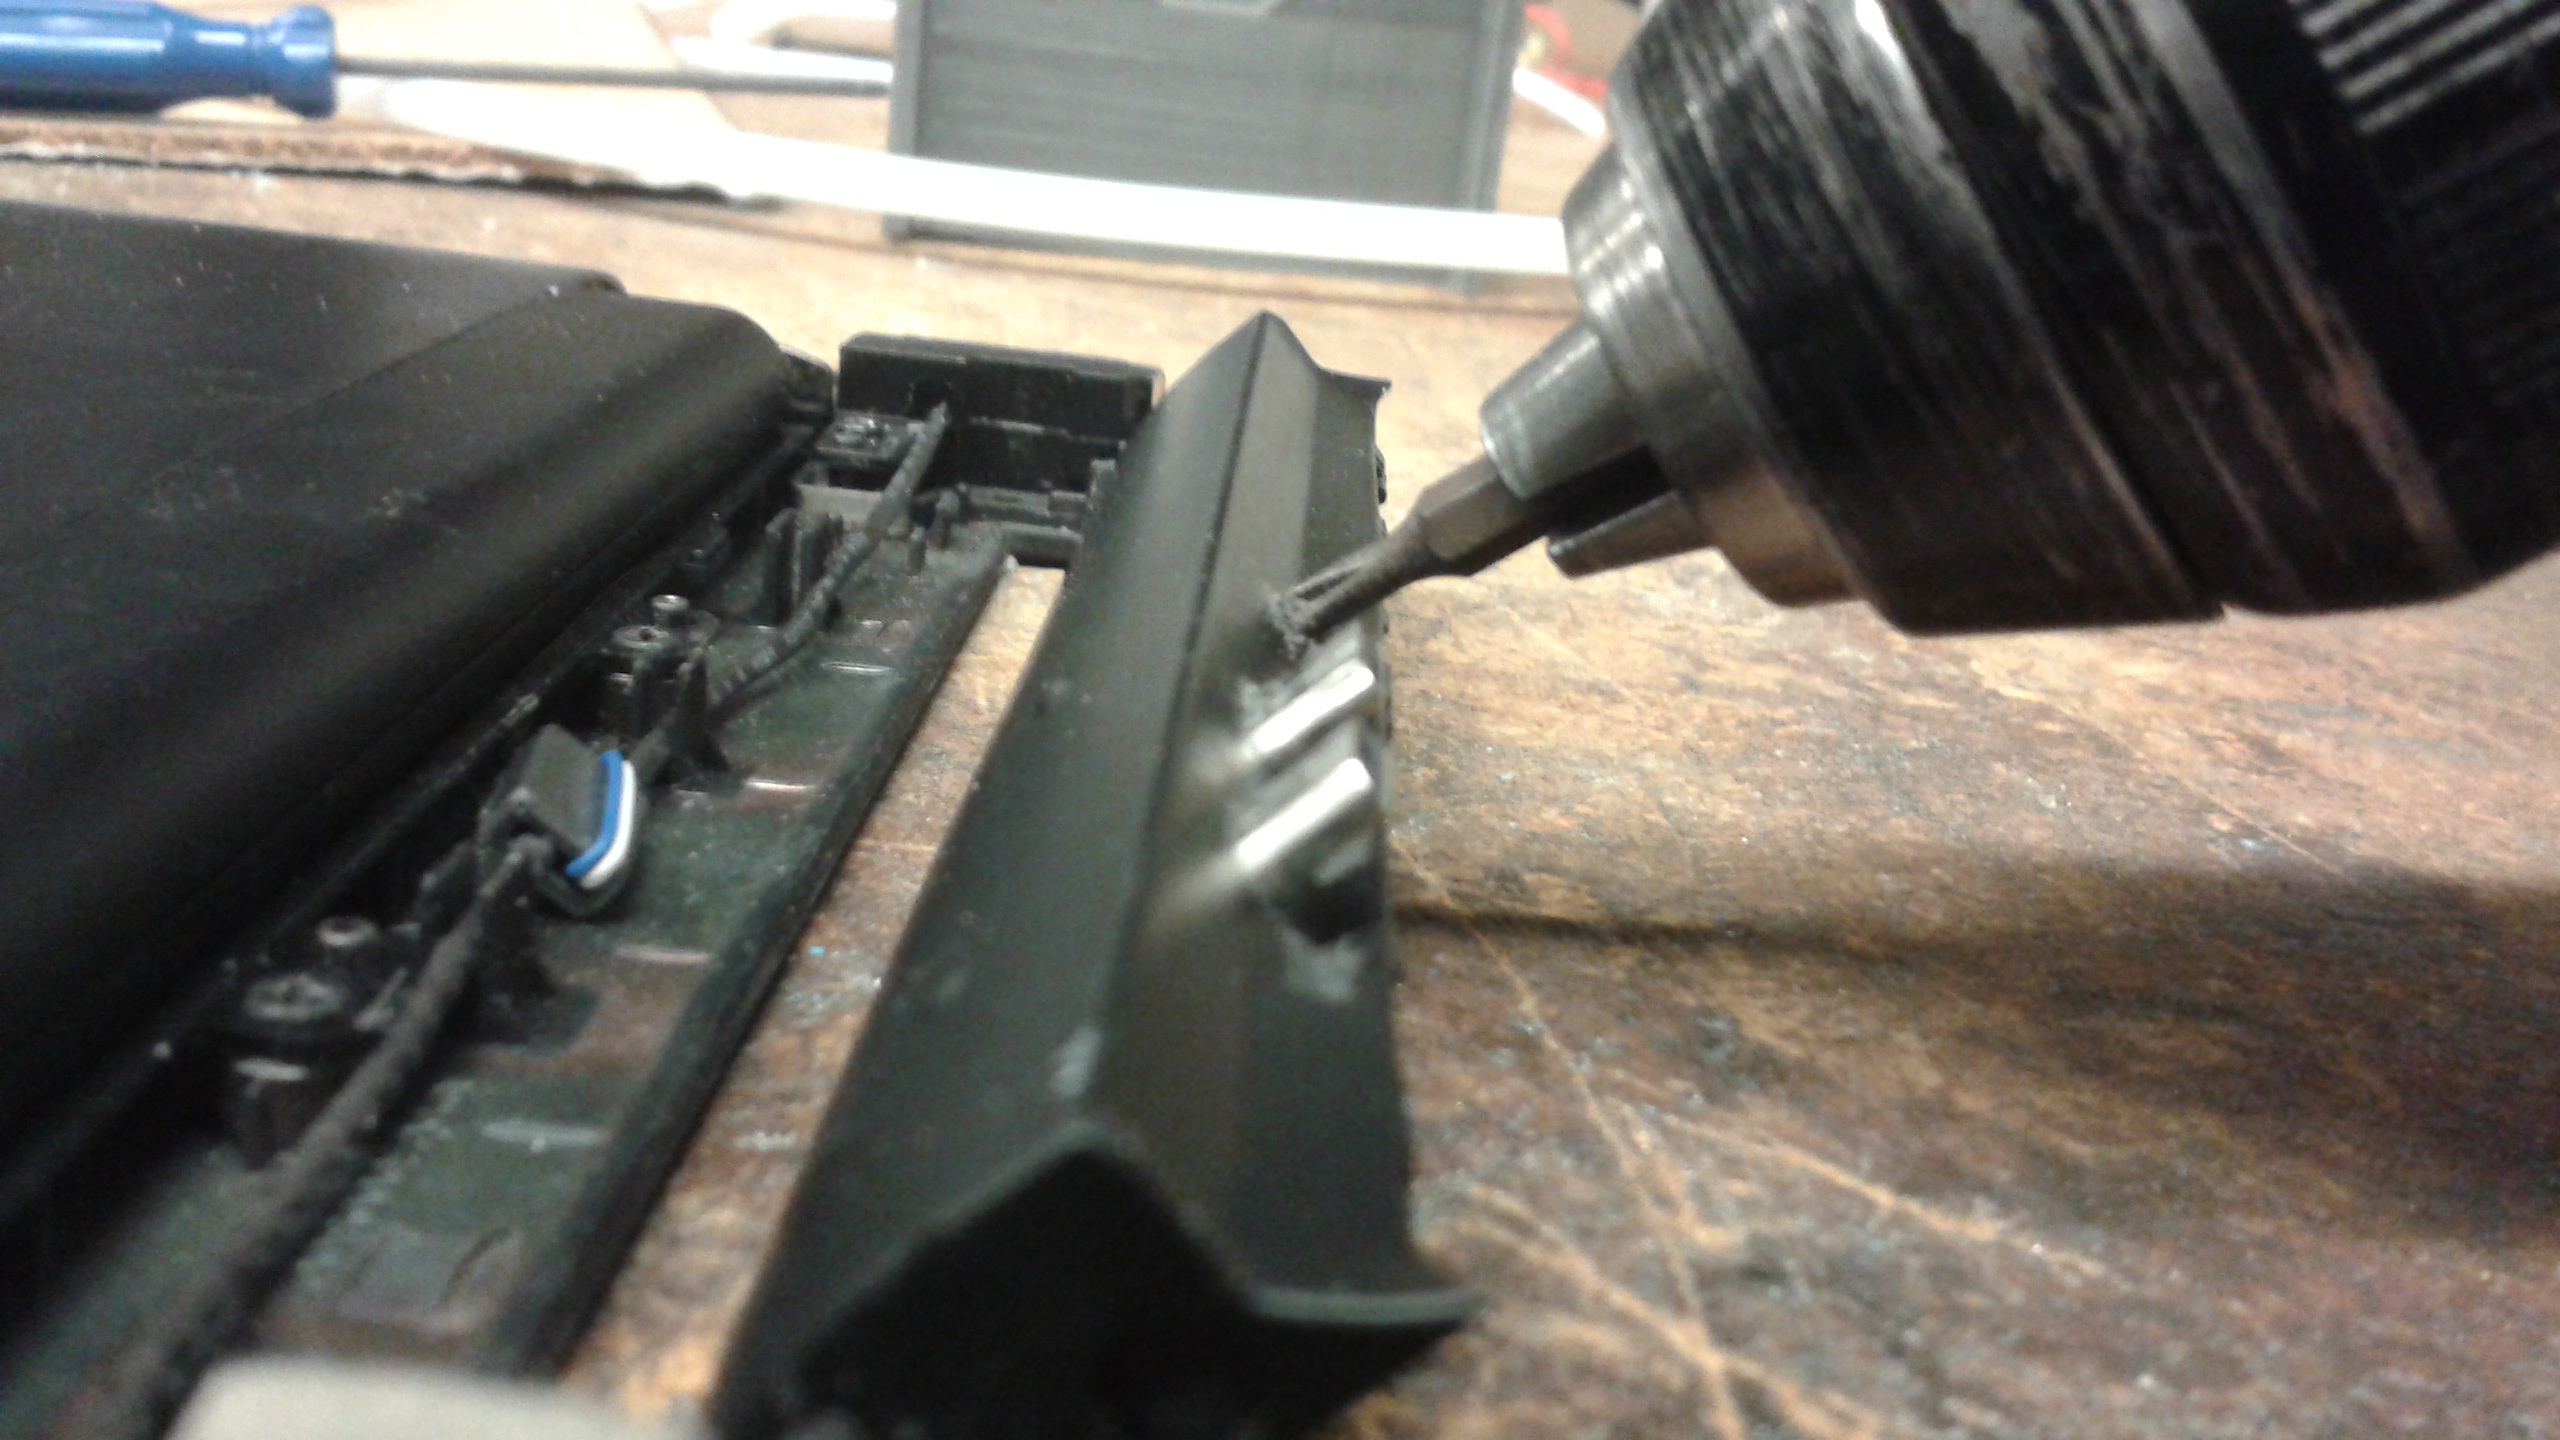
Now we need to bring this out the back of the lapdock. This area of the lapdock can be difficult to access. Most of the disassembly is straightforward, but note that there is a screw on either end of the rotating plastic piece that holds the connectors hidden under a cap that must be removed:
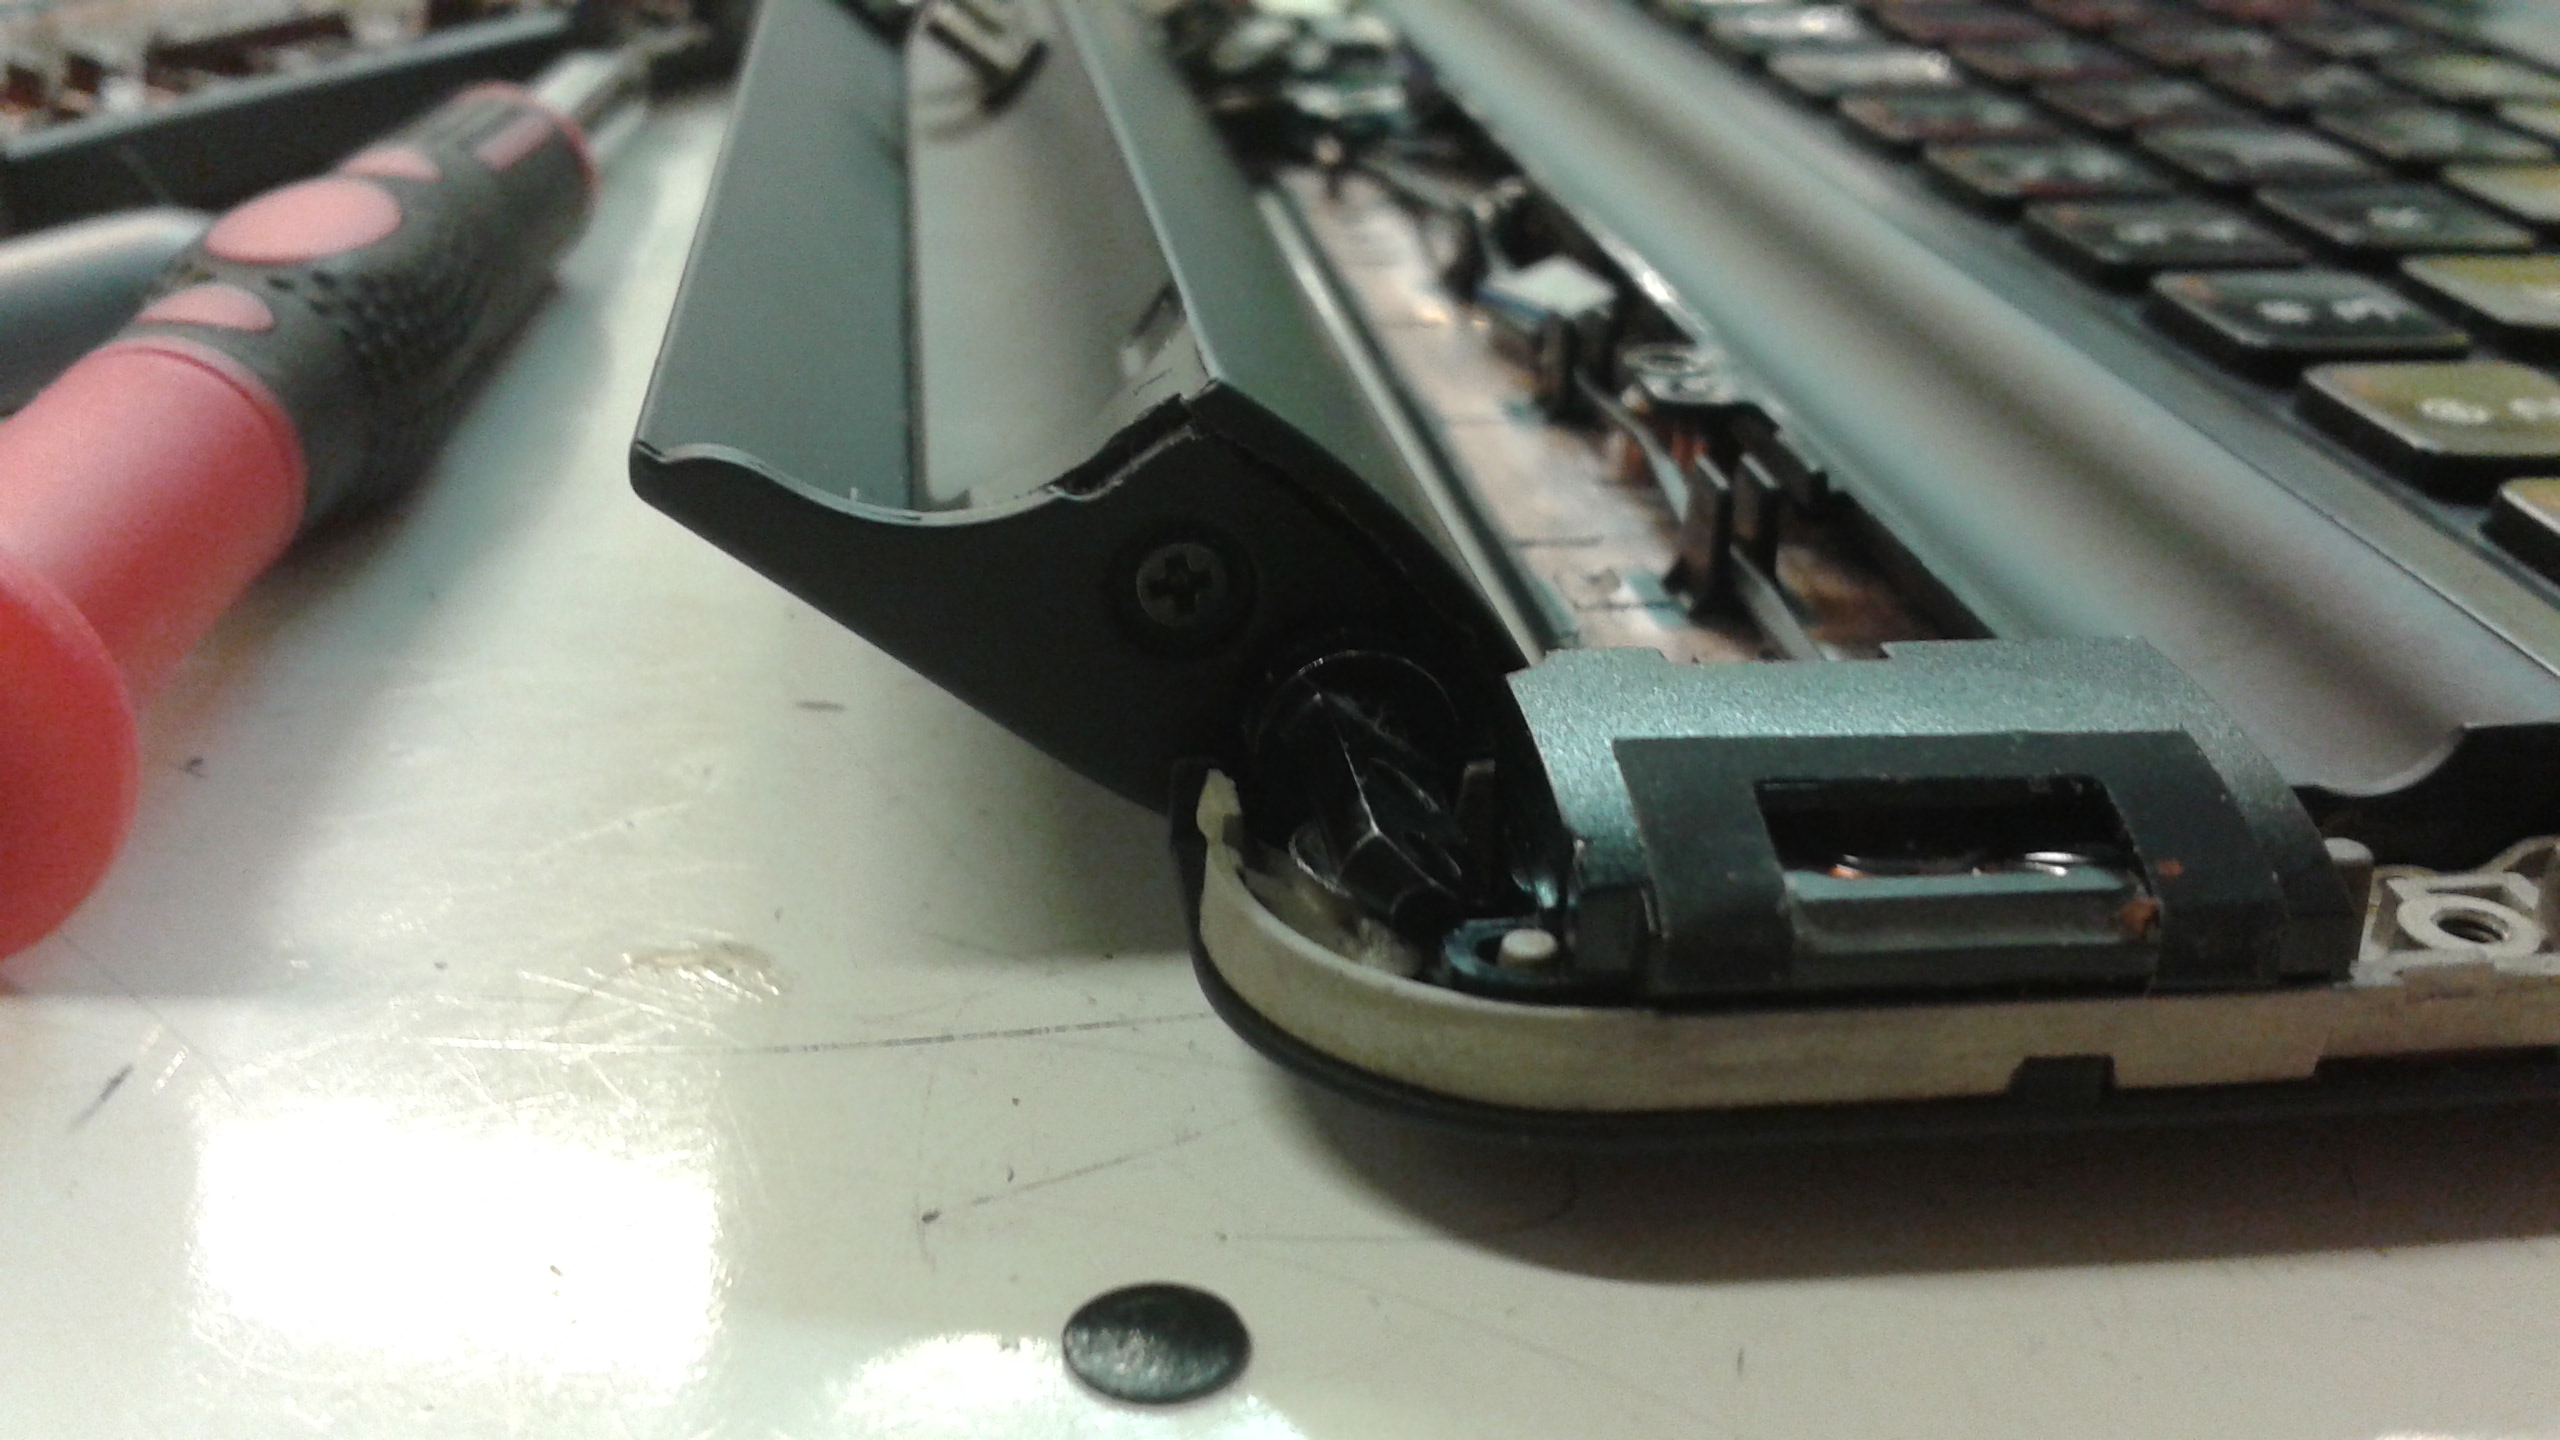 The small plastic cover is glued on top of each screw and must be pried off.
Also, some Lapdock versions have an extra piece of plastic that serves to hide a seam. It can be removed just by pulling with force:

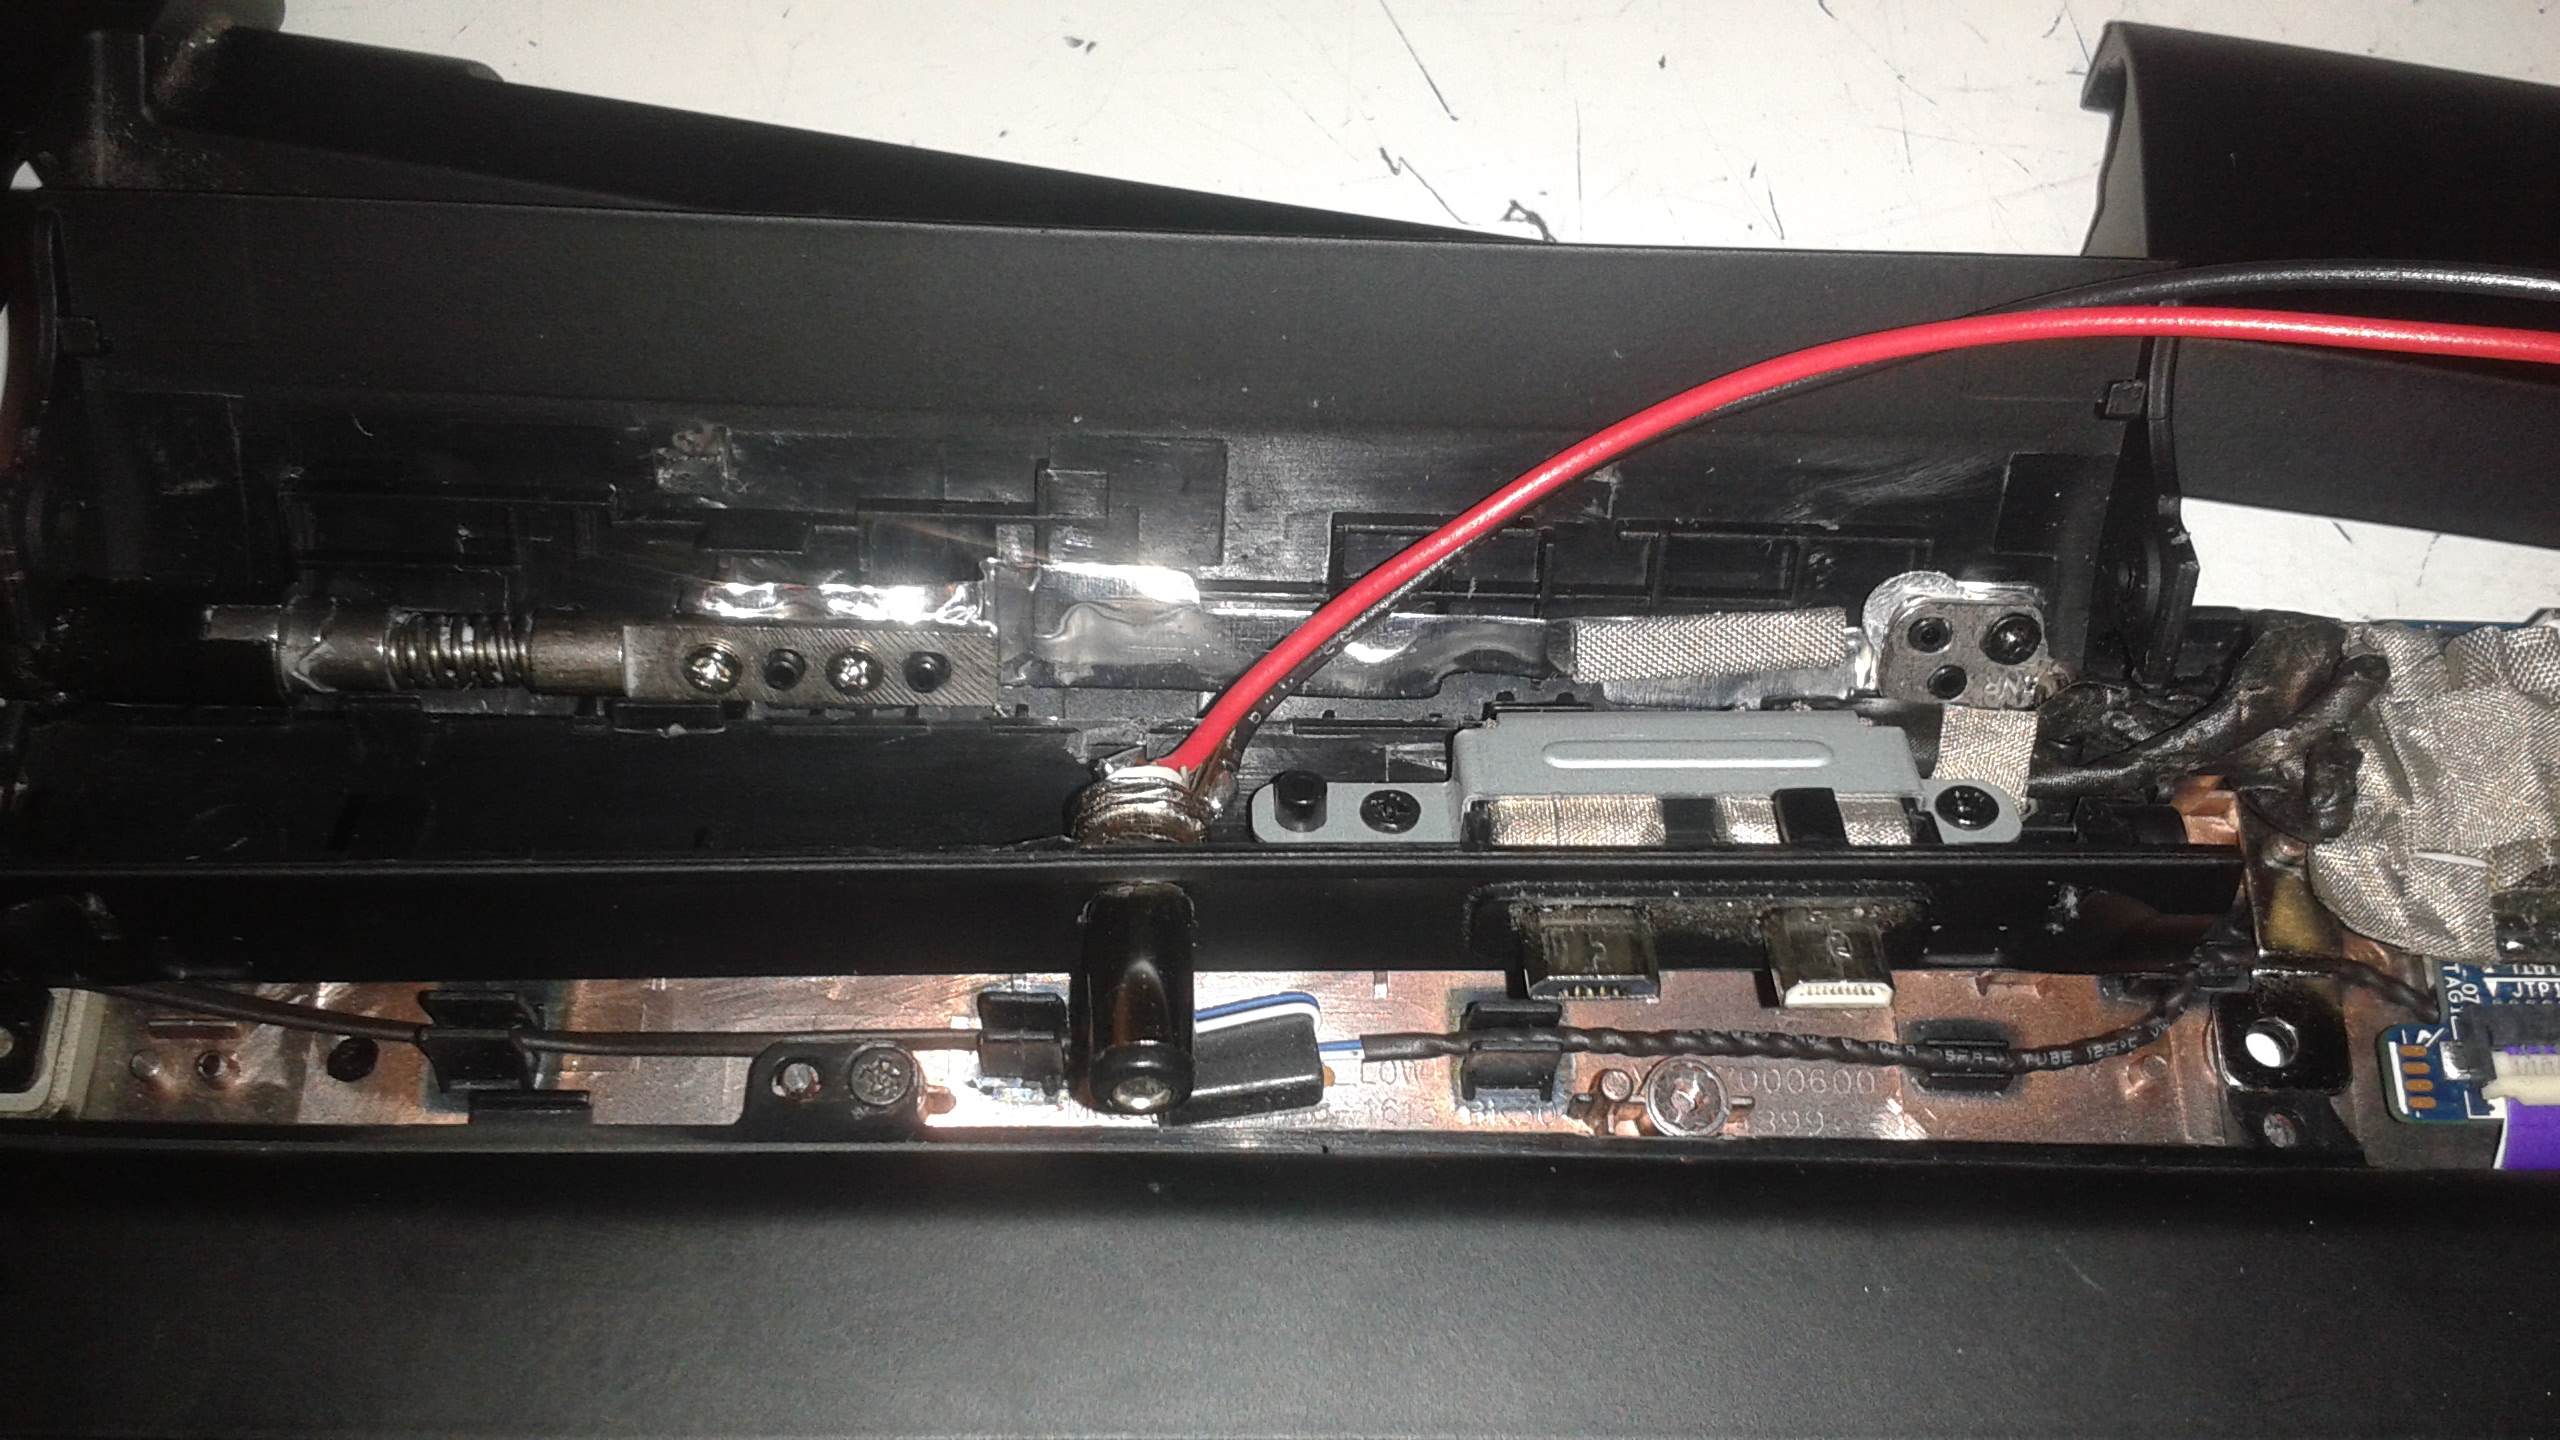
Finally, the connector panel should look like this when it's opened:

For my version, there was a large enough gap inside the housing that we could fit another connector. So, start drilling:
 A 7/32" bit seemed to be the perfect fit.
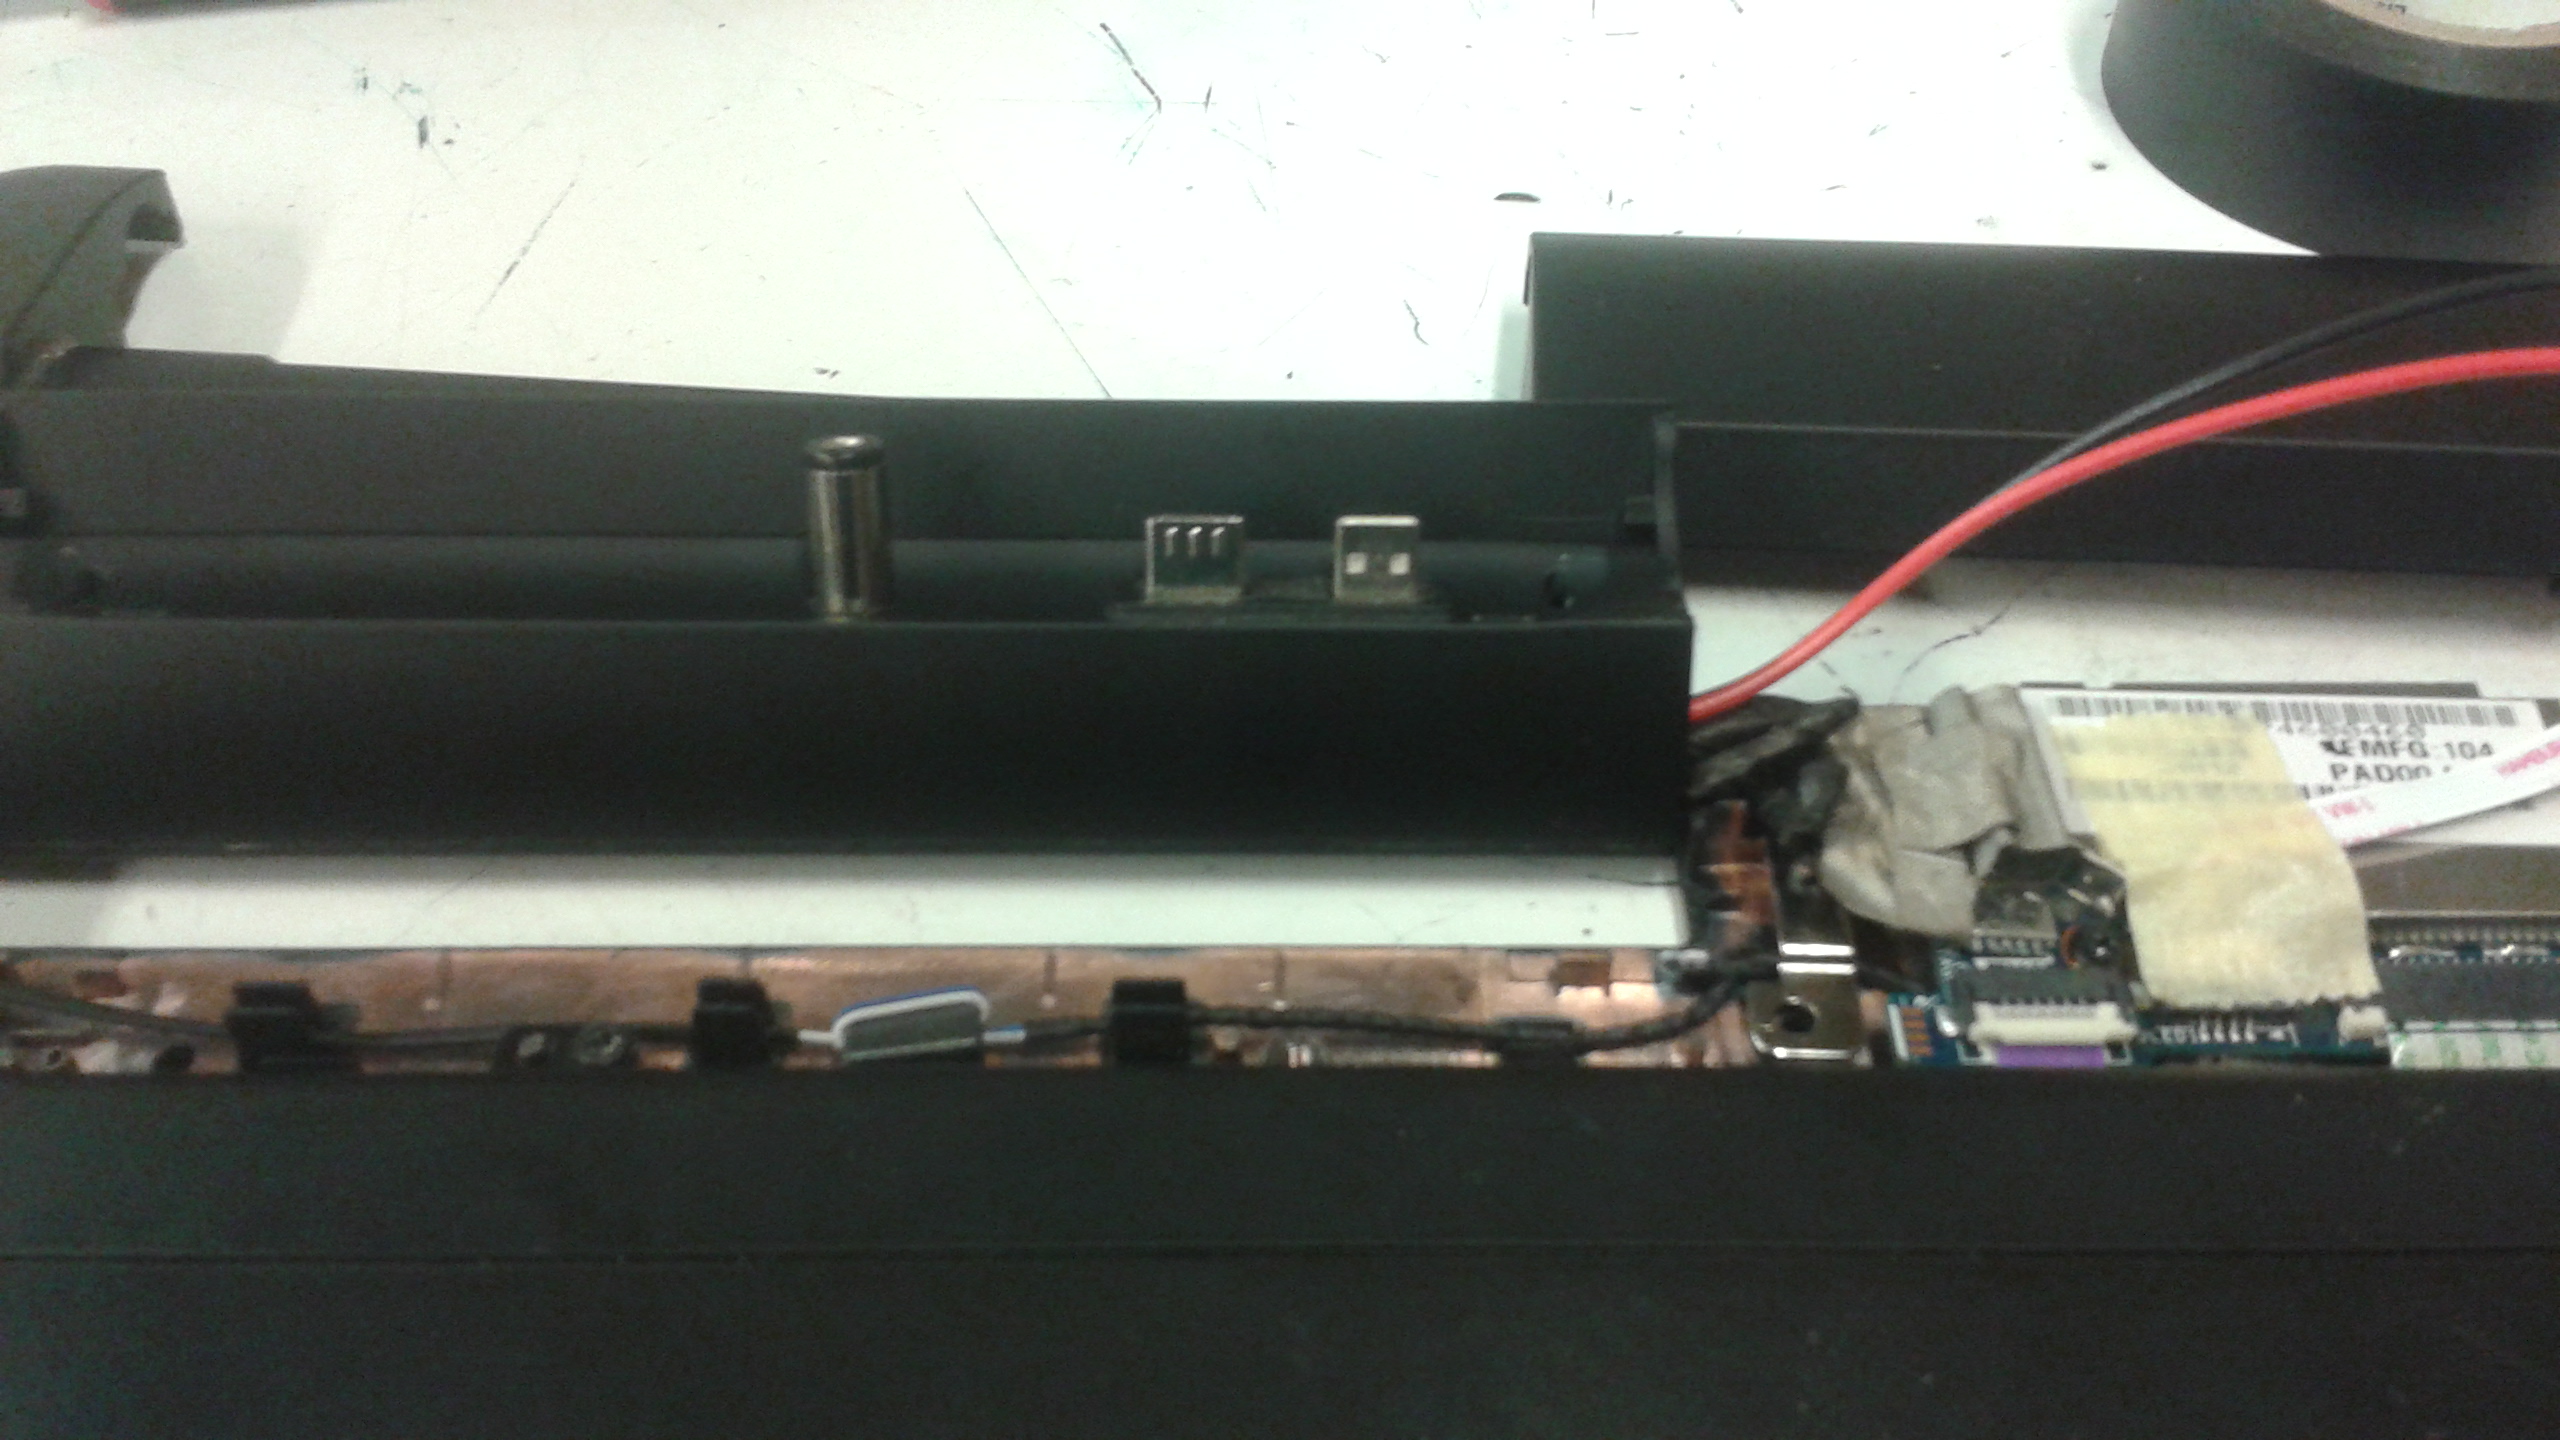
Then just insert the other end of the connector:
And finally, route the wires out the gap in the side of the housing and close it up like so:
Software
After assembling all the hardware, I flashed an Arch Linux image to a flash drive and booted the system over USB. Everything worked more or less out-of-the-box after following the installation instructions, although there are a few non-blocking issues:
- 1. Touchpad has no two-finger- or edge-scrolling.
- 2. Keyboard has no Super key.
- 3. No OS integration for the battery.
- 4. Limited video output options.
1. This problem is a bit more interesting than it first sounds. The touchpad identifies itself as a mouse and communicates over HID, so there's nothing that can be done to enable edge scrolling on the OS side. However, there's still a slight deadzone on the right hand side of the touchpad (and none on the left, top or bottom)! Perhaps this feature had to be scrapped in order to meet some deadline. Maybe it can even be enabled by jumping some pins on the touchpad driver IC, or sending some special USB command. Unfortunately, I can't find any documentation for the touchpad driver.
The solution I decided upon is to configure a keyboard shortcut (ctrl+space) which toggles the touchpad between normal mode and "scrolling mode". In scrolling mode, moving my finger up/down across the touchpad creates mouse-wheel events instead of cursor movements. This is accomplished via xinput's wheel emulation (and as such, my implementation of the solution only works for X11 users).
2. I addressed the lack of a super-key just by modifying my desktop environment's shortcuts (I remapped Alt+/ to activate GNOME's program launcher). I imagine this is probably pretty easy to do for most linux desktop environments.
3. Because the system doesn't know about the battery, it's impossible to configure automatic power modes for when running on AC vs. battery. It also means the only battery info available is the 5-LED readout right below the touchpad, which offers very little resolution. I can't think of any easy workaround for this.
4. The 5th generation NUC has 1 HDMI and 1 DisplayPort output. With the lapdock connected over HDMI, this means only one external display can be connected, and it must be over DisplayPort. Alternatively, one can disconnect the lapdock and use the HDMI interface (e.g. to connect to a project), but then the keyboard and touchpad become unusable - the lapdock disables its USB interface when it doesn't detect a device on the other end of the HDMI. A solution may be to alter the HDMI cable such that the hot plug signal is permanently shorted.
Aside from these drawbacks, the system works great. I use this computer to compile large code projects, watch videos, write music with a DAW, share files over P2P, and play casual games (TF2, Stepmania, Towerfall Ascension) without issue. And as far as laptop keyboards go, the Lapdock's is, surprisingly, really good. It's got an unusually high amount of tactile feedback, and I'm rather fond of the placement of the page-up/down keys (they're folded into the arrow keys via the use of the fn button, which makes for convenient document scrolling using the keyboard. On top of that, there are two fn keys located such that every special key can always be activated with just one hand).
Bill of Materials
- 1x Motorola Lapdock
- 1x Intel NUC5i5RYK
- 1x Micro HDMI Female To Mini HDMI Male Cable
- 1x USB Micro Female to USB Male Cable
- 1x Male DC Power Connector
- 1x Male to Female DC Power Adapter
- 2x8 GB LPDDR3 RAM
- 1x 500 GB M.2 SSD
Depending on where you source these components, the total cost is around $600. The most interesting alternative to using a NUC for this project is the Kangaroo Plus Mobile Mini PC. It's not as powerful, but it contains its own battery and is much smaller. As to the Lapdock, there aren't many alternatives, though there is a crowd-funded product yet to reach the market called Nexdock, as well as HP's pricier HP Elite x3 Lap Dock. It's unclear if either of these devices are as easily hackable as Motorola's original Lapdock though.
Closing Thoughts
From a practical standpoint, there really isn't much point to owning a laptop like this. One can find similar (refurbished) laptops at a similar price point. From an artistic point of view, it's unique - it draws funny looks and silly questions every week. And its the only laptop that will ever give you this display when you power it down: